> ## Documentation Index
> Fetch the complete documentation index at: https://docs.cube.dev/llms.txt
> Use this file to discover all available pages before exploring further.
# Create a project
> In this step, we will create a Cube Core project on your computer, connect a data source, and generate data models.
## Scaffold a project
Start by opening your terminal to create a new folder for the project, then
create a `docker-compose.yml` file within it:
```bash theme={"dark"}
mkdir my-first-cube-project
cd my-first-cube-project
touch docker-compose.yml
```
Open the `docker-compose.yml` file and add the following content:
```yaml theme={"dark"}
services:
cube:
image: cubejs/cube:latest
ports:
- 4000:4000
- 15432:15432
environment:
- CUBEJS_DEV_MODE=true
volumes:
- .:/cube/conf
```
Note that we're setting the [`CUBEJS_DEV_MODE`](/reference/configuration/environment-variables#cubejs_dev_mode) environment variable to `true` to
enable the [Development Mode](/admin/connect-to-data#development-mode). This is
handy for local development but not suitable for
[production](/docs/deployment/production-checklist).
If you're using Linux as the Docker host OS, you'll also need to add
`network_mode: 'host'` to your `docker-compose.yml`.
## Start the development server
From the newly-created project directory, run the following command to start
Cube:
```bash theme={"dark"}
docker compose up -d
```
Using Windows? Remember to use [PowerShell][powershell-docs] or
[WSL2][wsl2-docs] to run the command below.
## Connect a data source
Head to [http://localhost:4000](http://localhost:4000) to open the [Developer
Playground][ref-devtools-playground].
The Playground has a database connection wizard that loads when Cube is first
started up and no `.env` file is found. After database credentials have been set
up, an `.env` file will automatically be created and populated with credentials.
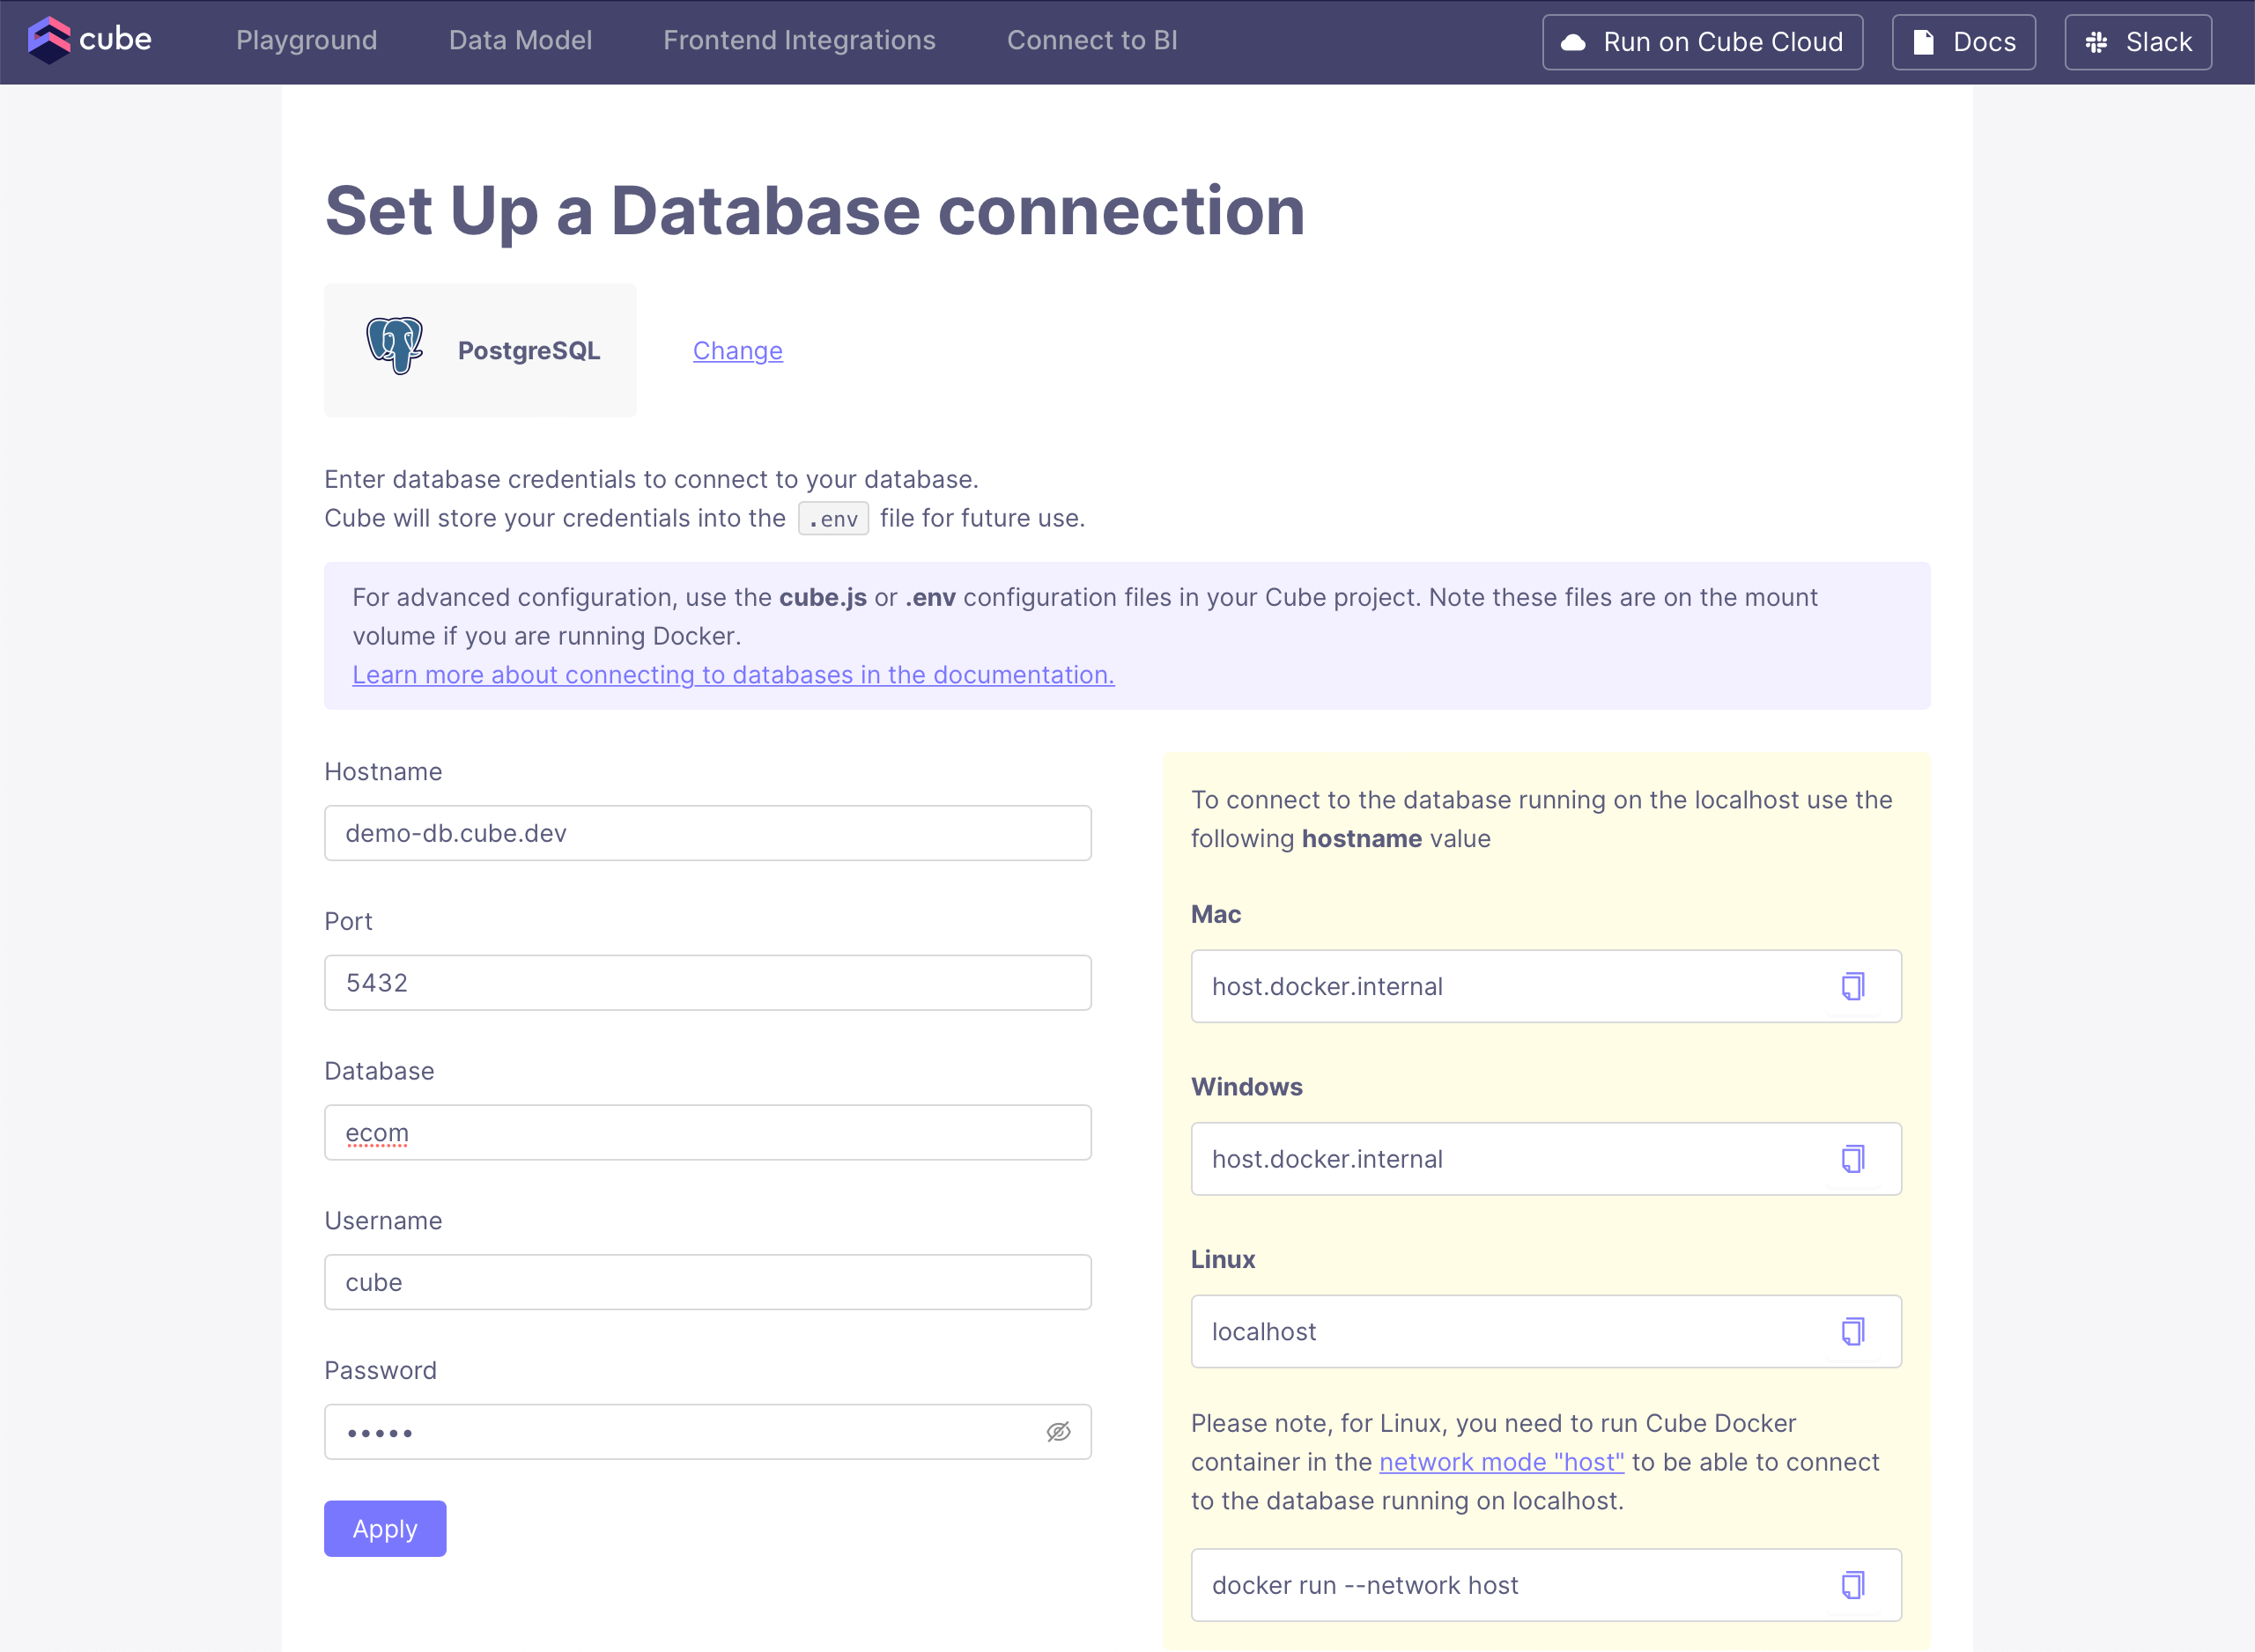
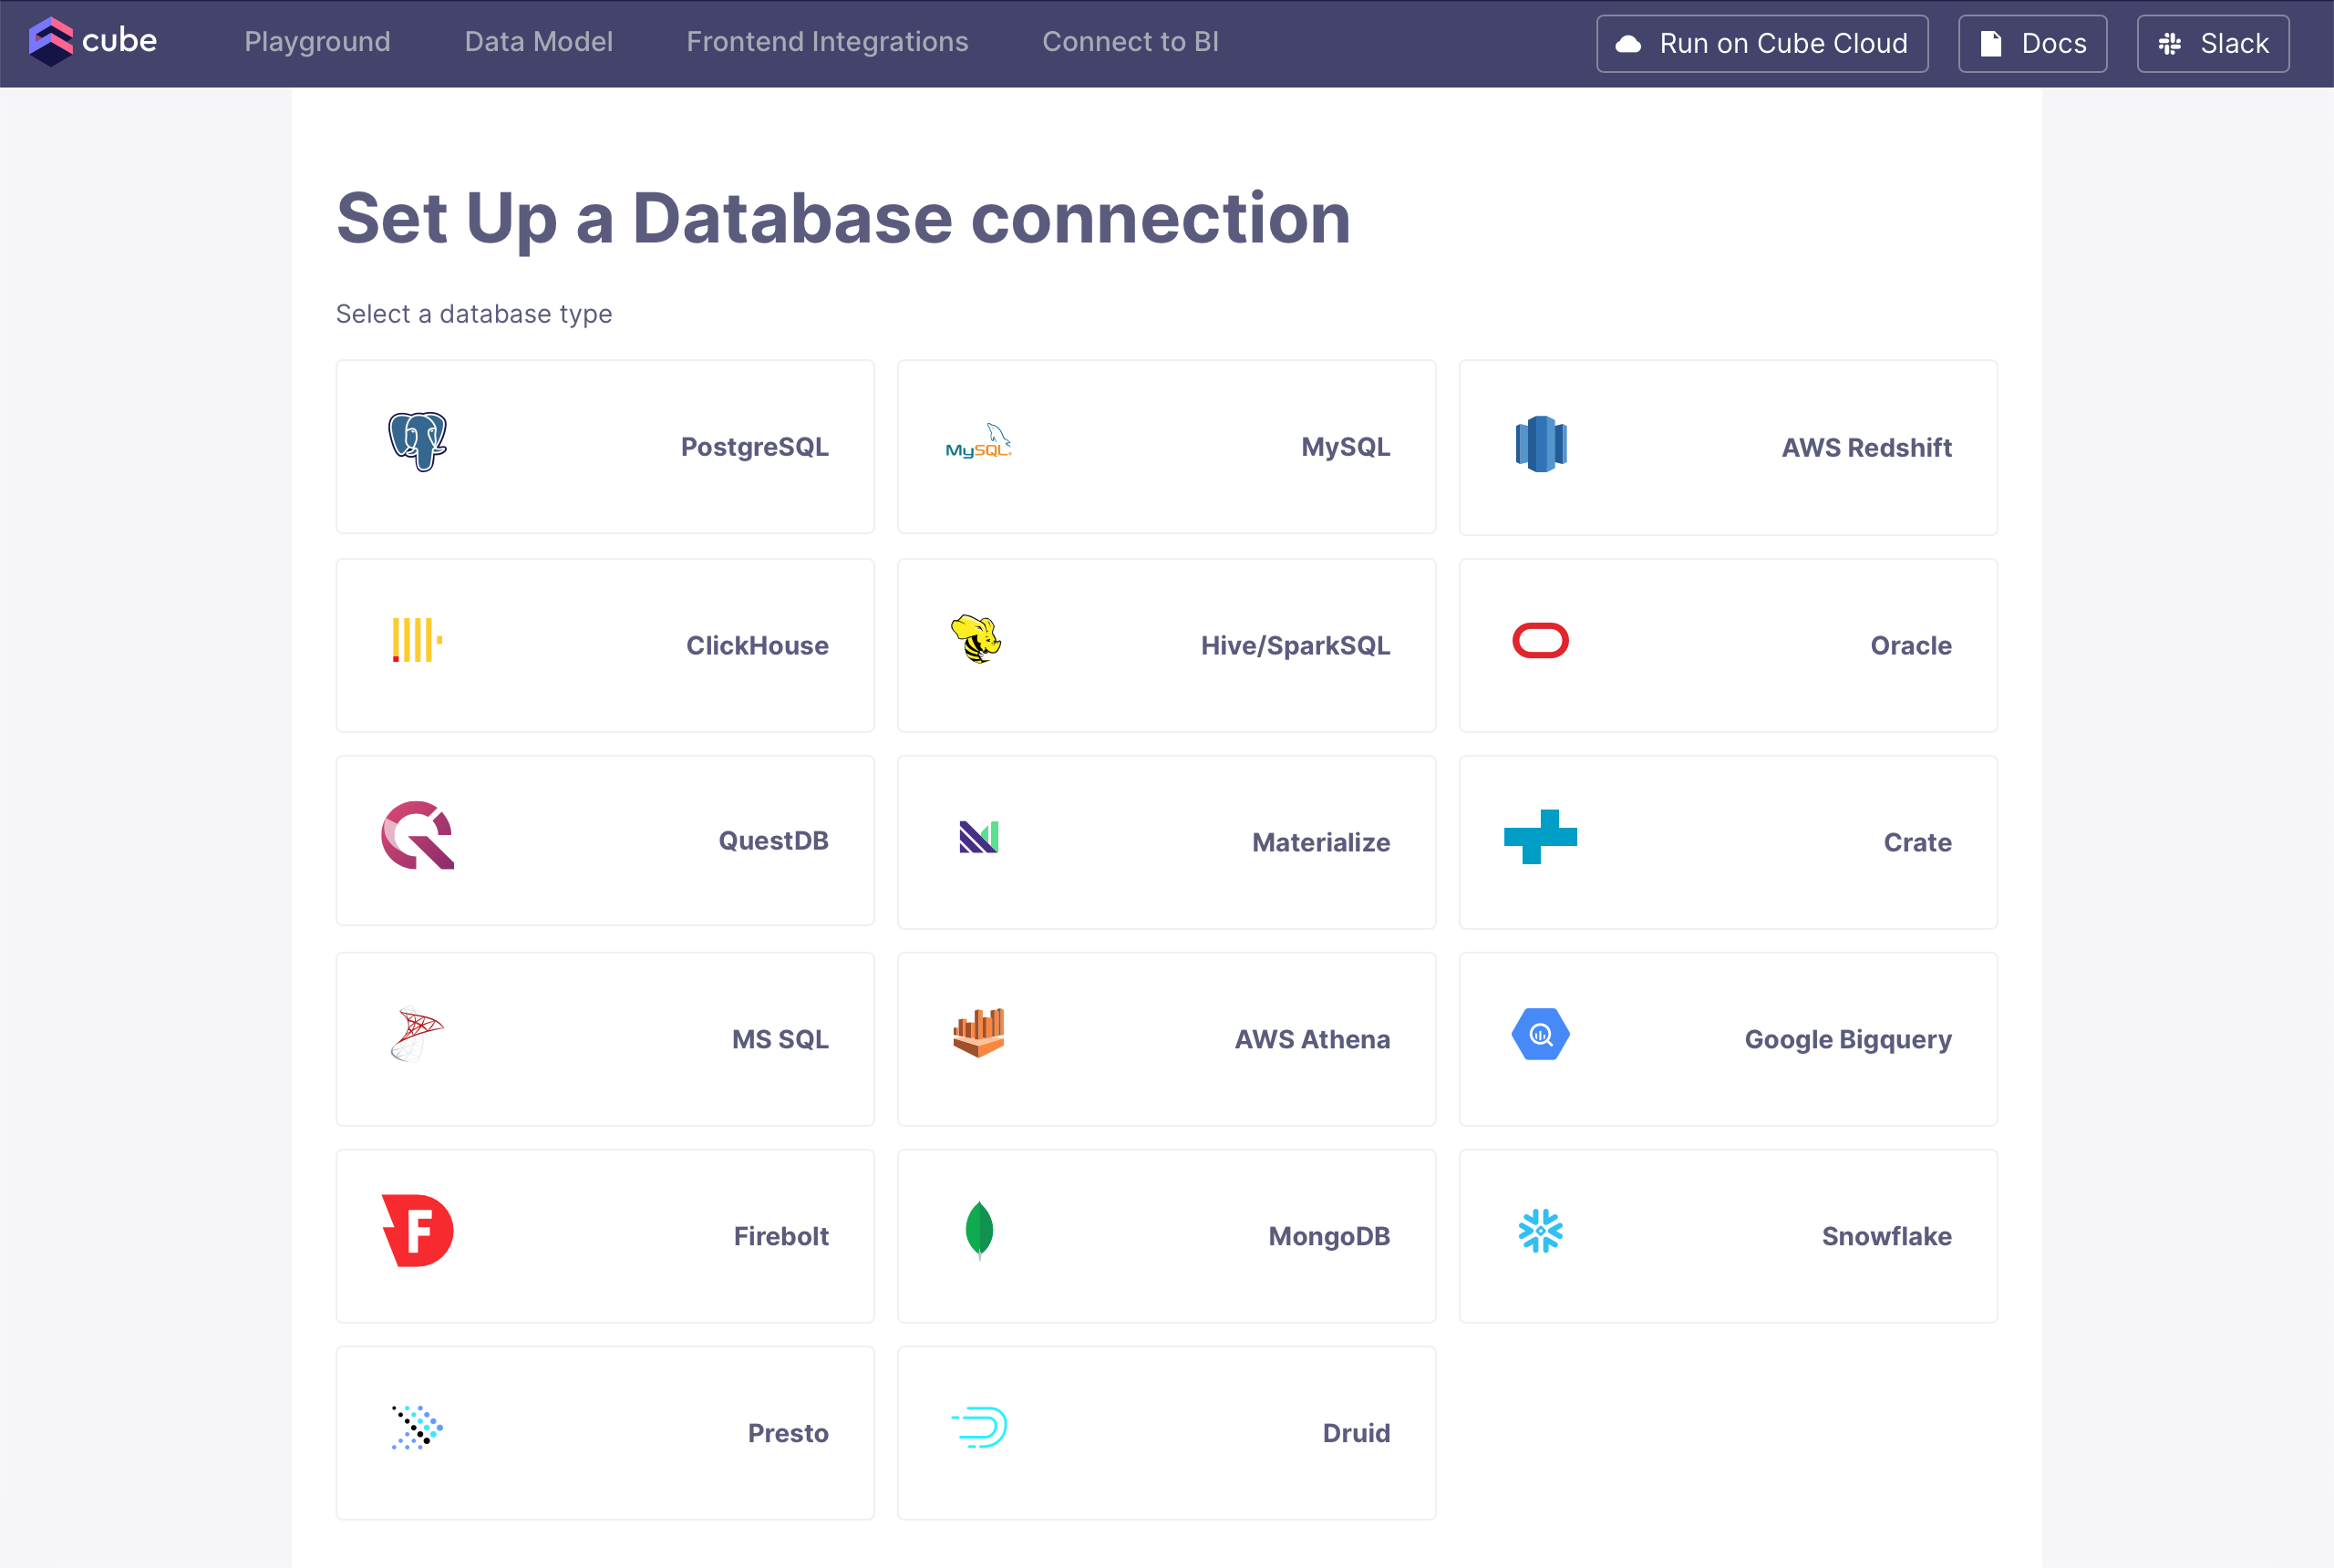 Want to use a sample database instead? Select **PostgreSQL** and use the
credentials below:
Want to use a sample database instead? Select **PostgreSQL** and use the
credentials below:
| Field | Value |
| -------- | ------------------ |
| Host | `demo-db.cube.dev` |
| Port | `5432` |
| Database | `ecom` |
| Username | `cube` |
| Password | `12345` |
After selecting the data source, enter valid credentials for it and
click **Apply**. Check the [Connecting to Databases][ref-conf-db] page
for more details on specific data sources.
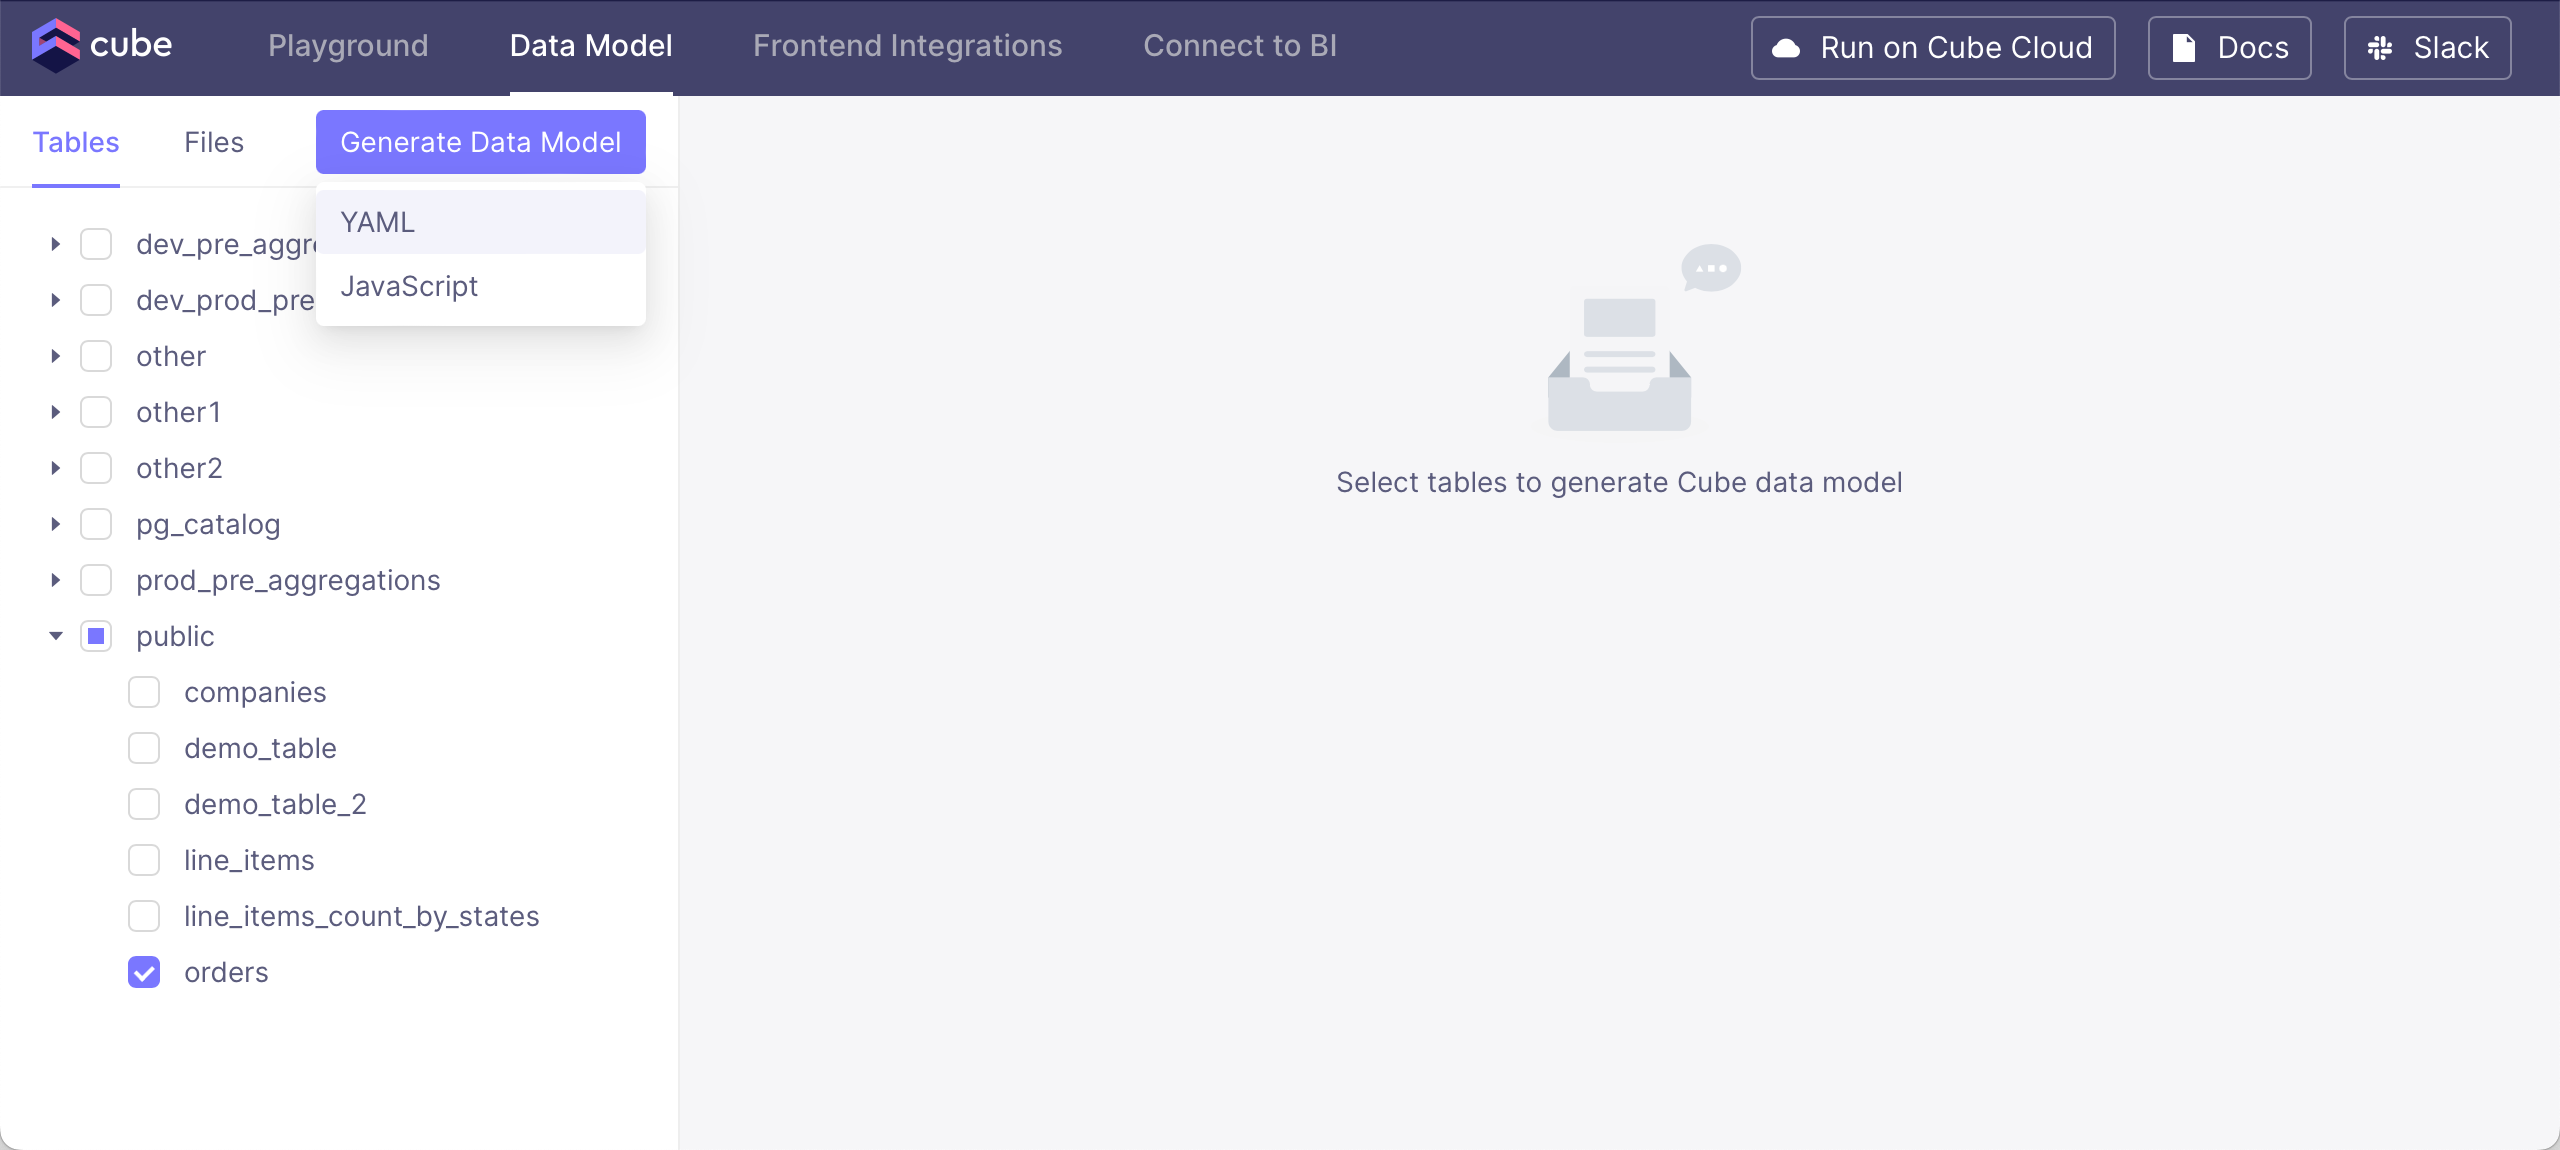
 You should see tables available to you from the configured database; select the
`orders` table. After selecting the table, click **Generate Data Model**
and pick either **YAML** (recommended) or **JavaScript** format:
You should see tables available to you from the configured database; select the
`orders` table. After selecting the table, click **Generate Data Model**
and pick either **YAML** (recommended) or **JavaScript** format:
 Finally, click **Build** in the dialog, which should take you to
the **Build** page.
You're now ready for the next step, [querying the
data][ref-getting-started-core-query-cube].
[powershell-docs]: https://learn.microsoft.com/en-us/powershell/
[ref-conf-db]: /admin/connect-to-data/data-sources
[ref-getting-started-core-query-cube]: /docs/getting-started/core/query-data
[ref-devtools-playground]: /docs/workspace/playground
[wsl2-docs]: https://learn.microsoft.com/en-us/windows/wsl/install
Finally, click **Build** in the dialog, which should take you to
the **Build** page.
You're now ready for the next step, [querying the
data][ref-getting-started-core-query-cube].
[powershell-docs]: https://learn.microsoft.com/en-us/powershell/
[ref-conf-db]: /admin/connect-to-data/data-sources
[ref-getting-started-core-query-cube]: /docs/getting-started/core/query-data
[ref-devtools-playground]: /docs/workspace/playground
[wsl2-docs]: https://learn.microsoft.com/en-us/windows/wsl/install