> ## Documentation Index
> Fetch the complete documentation index at: https://docs.cube.dev/llms.txt
> Use this file to discover all available pages before exploring further.
# Authenticate requests to Cube with AWS Cognito
> Step-by-step wiring of AWS Cognito User Pools and Hosted UI to Cube, including optional Lambda hooks for custom JWT claims.
## Introduction
In this guide, you'll learn how to integrate AWS Cognito authentication with a
Cube deployment. If you already have a pre-existing Cognito User Pool in AWS
that you'd like to re-use, please skip ahead to
[Configure Cube](#configure-cube).
## Create and configure a User Pool
If you haven't already created a User Pool, please follow [the instructions in
the AWS Cognito documentation][link-aws-cognito-hosted-ui] to create one, along
with enabling the Hosted UI.
### Custom claims
To add custom claims to the JWT, you will need to associate [a Lambda
function][link-aws-lambda] to the [Pre Token Generation event
trigger][link-aws-cognito-pre-token] available on your User Pool.
First, go to the AWS Lambda Console and create new a Lambda function:
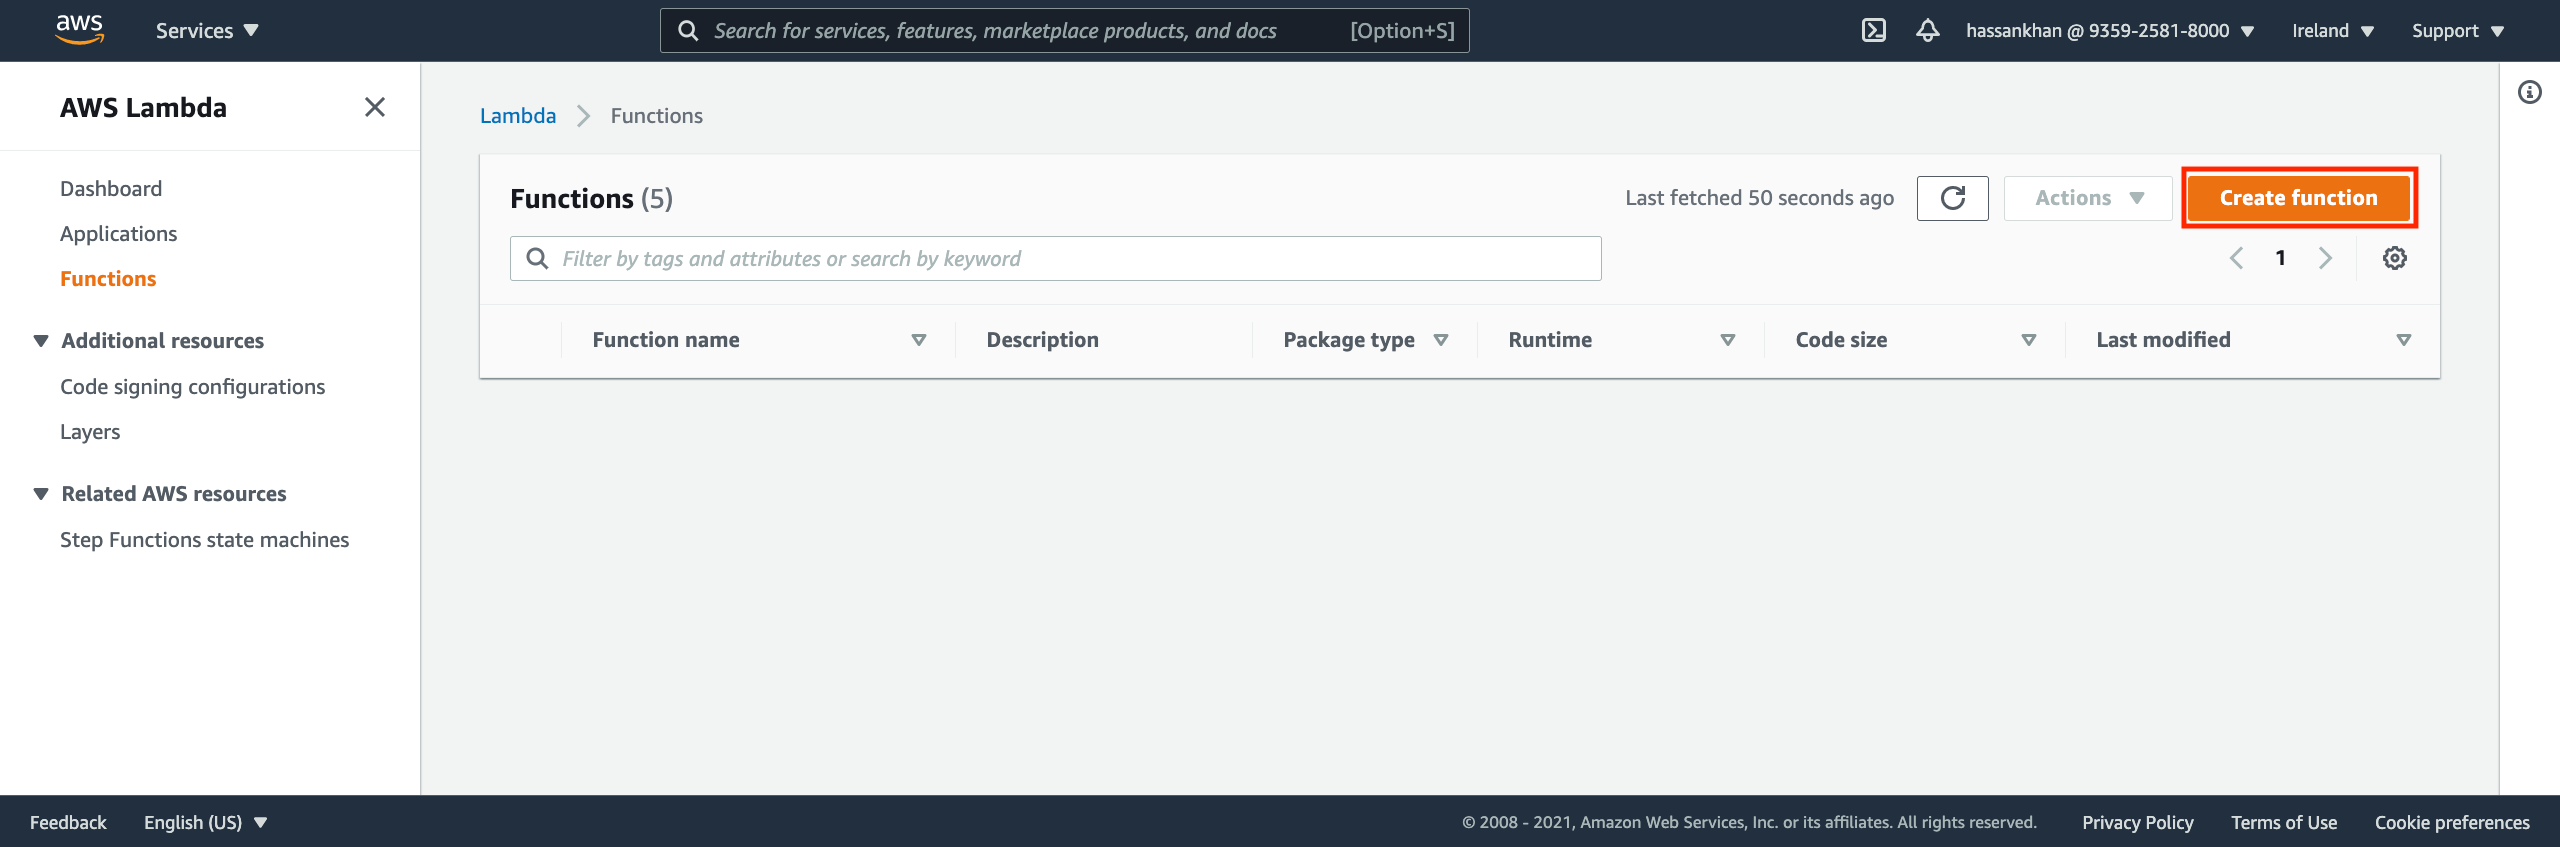
Add the following code to the Lambda function:
```javascript theme={"dark"}
exports.handler = (event, context, callback) => {
event.response = {
claimsOverrideDetails: {
claimsToAddOrOverride: {
"http://localhost:4000/": JSON.stringify({
company_id: "company1",
user_id: event.request.userAttributes.sub,
roles: ["user"]
})
}
}
}
callback(null, event)
}
```
Then navigate to the Amazon Cognito User Pools Console, select Triggers from the
left sidebar and associate the Lambda function you created previously:
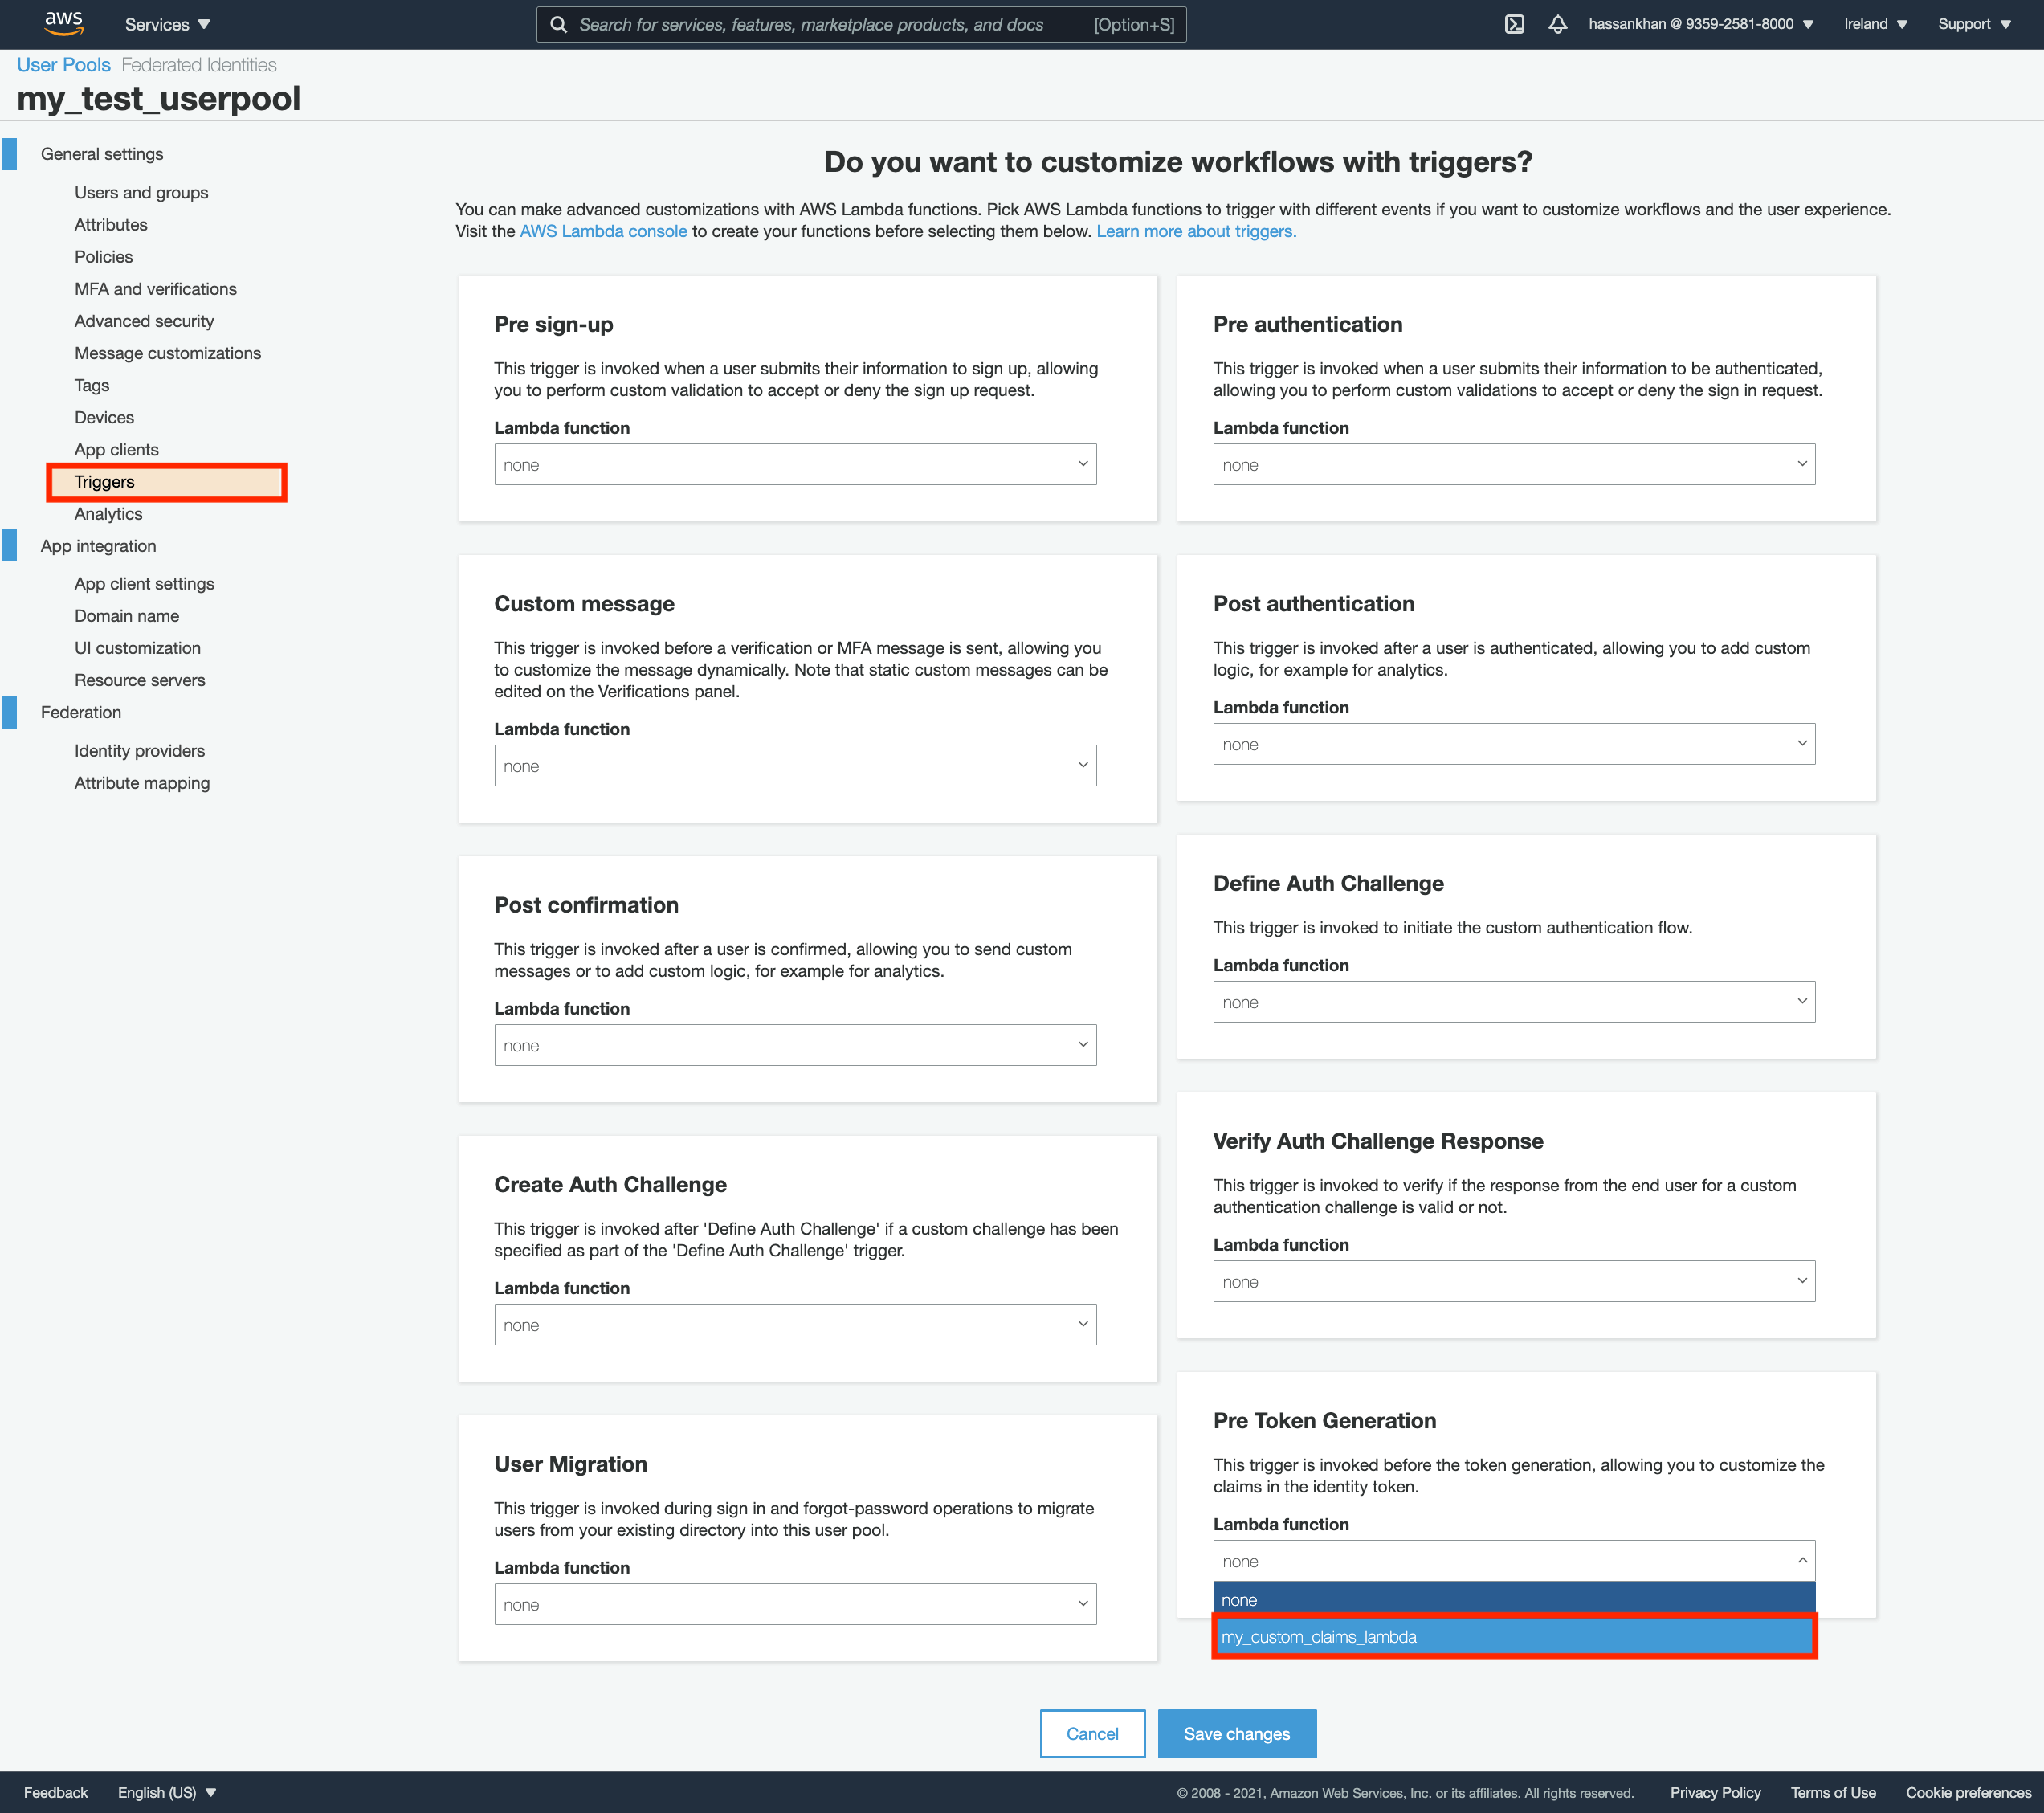
You can find more examples of [modifying claims in JWTs
here][link-aws-cognito-pretoken-example].
## Configure Cube
Now we're ready to configure Cube to use AWS Cognito. Go to your Cube project
and open the `.env` file and add the following, replacing the values wrapped in
`<>`.
```dotenv theme={"dark"}
CUBEJS_JWK_URL=https://cognito-idp..amazonaws.com//.well-known/jwks.json
CUBEJS_JWT_AUDIENCE=
CUBEJS_JWT_ISSUER=https://cognito-idp..amazonaws.com/
CUBEJS_JWT_ALGS=RS256
CUBEJS_JWT_CLAIMS_NAMESPACE=
```
## Testing with the Developer Playground
### Retrieving a JWT
Go to the [OpenID Playground from Auth0][link-openid-playground] to and click
Configuration.

Change the Server Template to Custom, and enter the following values:
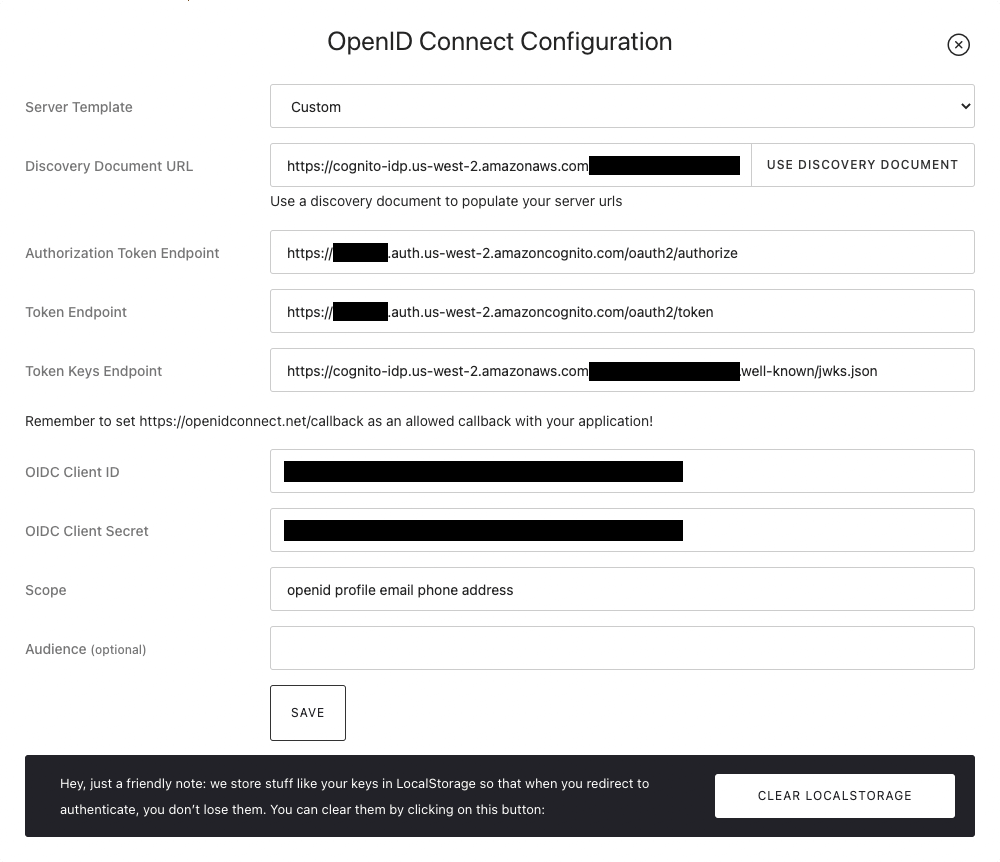
* **Discovery Document URL**:
`https://cognito-idp..amazonaws.com//.well-known/openid-configuration`
* **OIDC Client ID**: Retrieve from App Client settings page in AWS Cognito User
Pool Console
* **OIDC Client Secret**: Retrieve from App Client settings page in AWS Cognito
User Pool Console
Click 'Use Discovery Document' to auto-fill the remaining values, then click
Save.
If you haven't already, go back to the AWS Cognito App Client's settings and add
`https://openidconnect.net/callback` to the list of allowed callback URLs.
Now click Start; and in a separate tab, go to the App Client's settings page and
click the Launch Hosted UI button.
If the login is successful, you should be redirected to the OpenID Connect
Playground. Click on the Exchange button to exchange the code for your tokens:
Click Next, and continue on to the next section and click the Verify button to
verify the JWT signature as well as decode the identity token:
### Set JWT in Developer Playground
Now open the Developer Playground (at `http://localhost:4000`) and on the Build
page, click Add Security Context.
Click the Token tab, paste the `id_token` from OpenID Playground and click the
Save button.
Close the popup and use the Developer Playground to make a request. Any data
models using the [Security Context][ref-sec-ctx] should now work as expected.
[link-aws-cognito-hosted-ui]: https://docs.aws.amazon.com/cognito/latest/developerguide/cognito-user-pools-app-integration.html#cognito-user-pools-create-an-app-integration
[link-aws-cognito-pre-token]: https://docs.aws.amazon.com/cognito/latest/developerguide/user-pool-lambda-pre-token-generation.html
[link-aws-cognito-pretoken-example]: https://docs.aws.amazon.com/cognito/latest/developerguide/user-pool-lambda-pre-token-generation.html#aws-lambda-triggers-pre-token-generation-example-1
[link-aws-lambda]: https://docs.aws.amazon.com/lambda/latest/dg/welcome.html
[link-openid-playground]: https://openidconnect.net/
[ref-sec-ctx]: /docs/data-modeling/access-control/context