Step 1: Create an account
Navigate to cubecloud.dev, and create a new Cube Cloud account.Step 2: Create a new Deployment
Click Create Deployment. This is the first step in the deployment creation. Give it a name and select the cloud provider and region of your choice.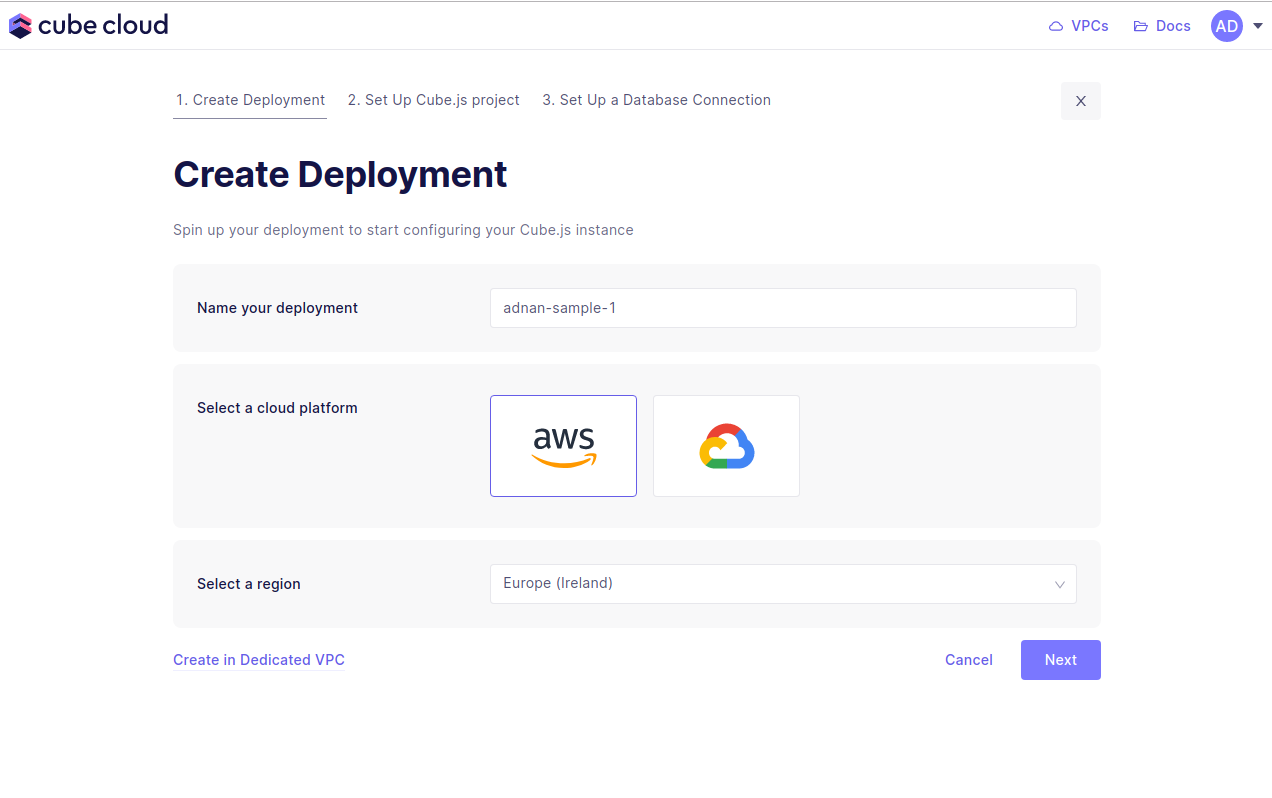
Microsoft Azure is available on Enterprise plan.
Contact us for details.
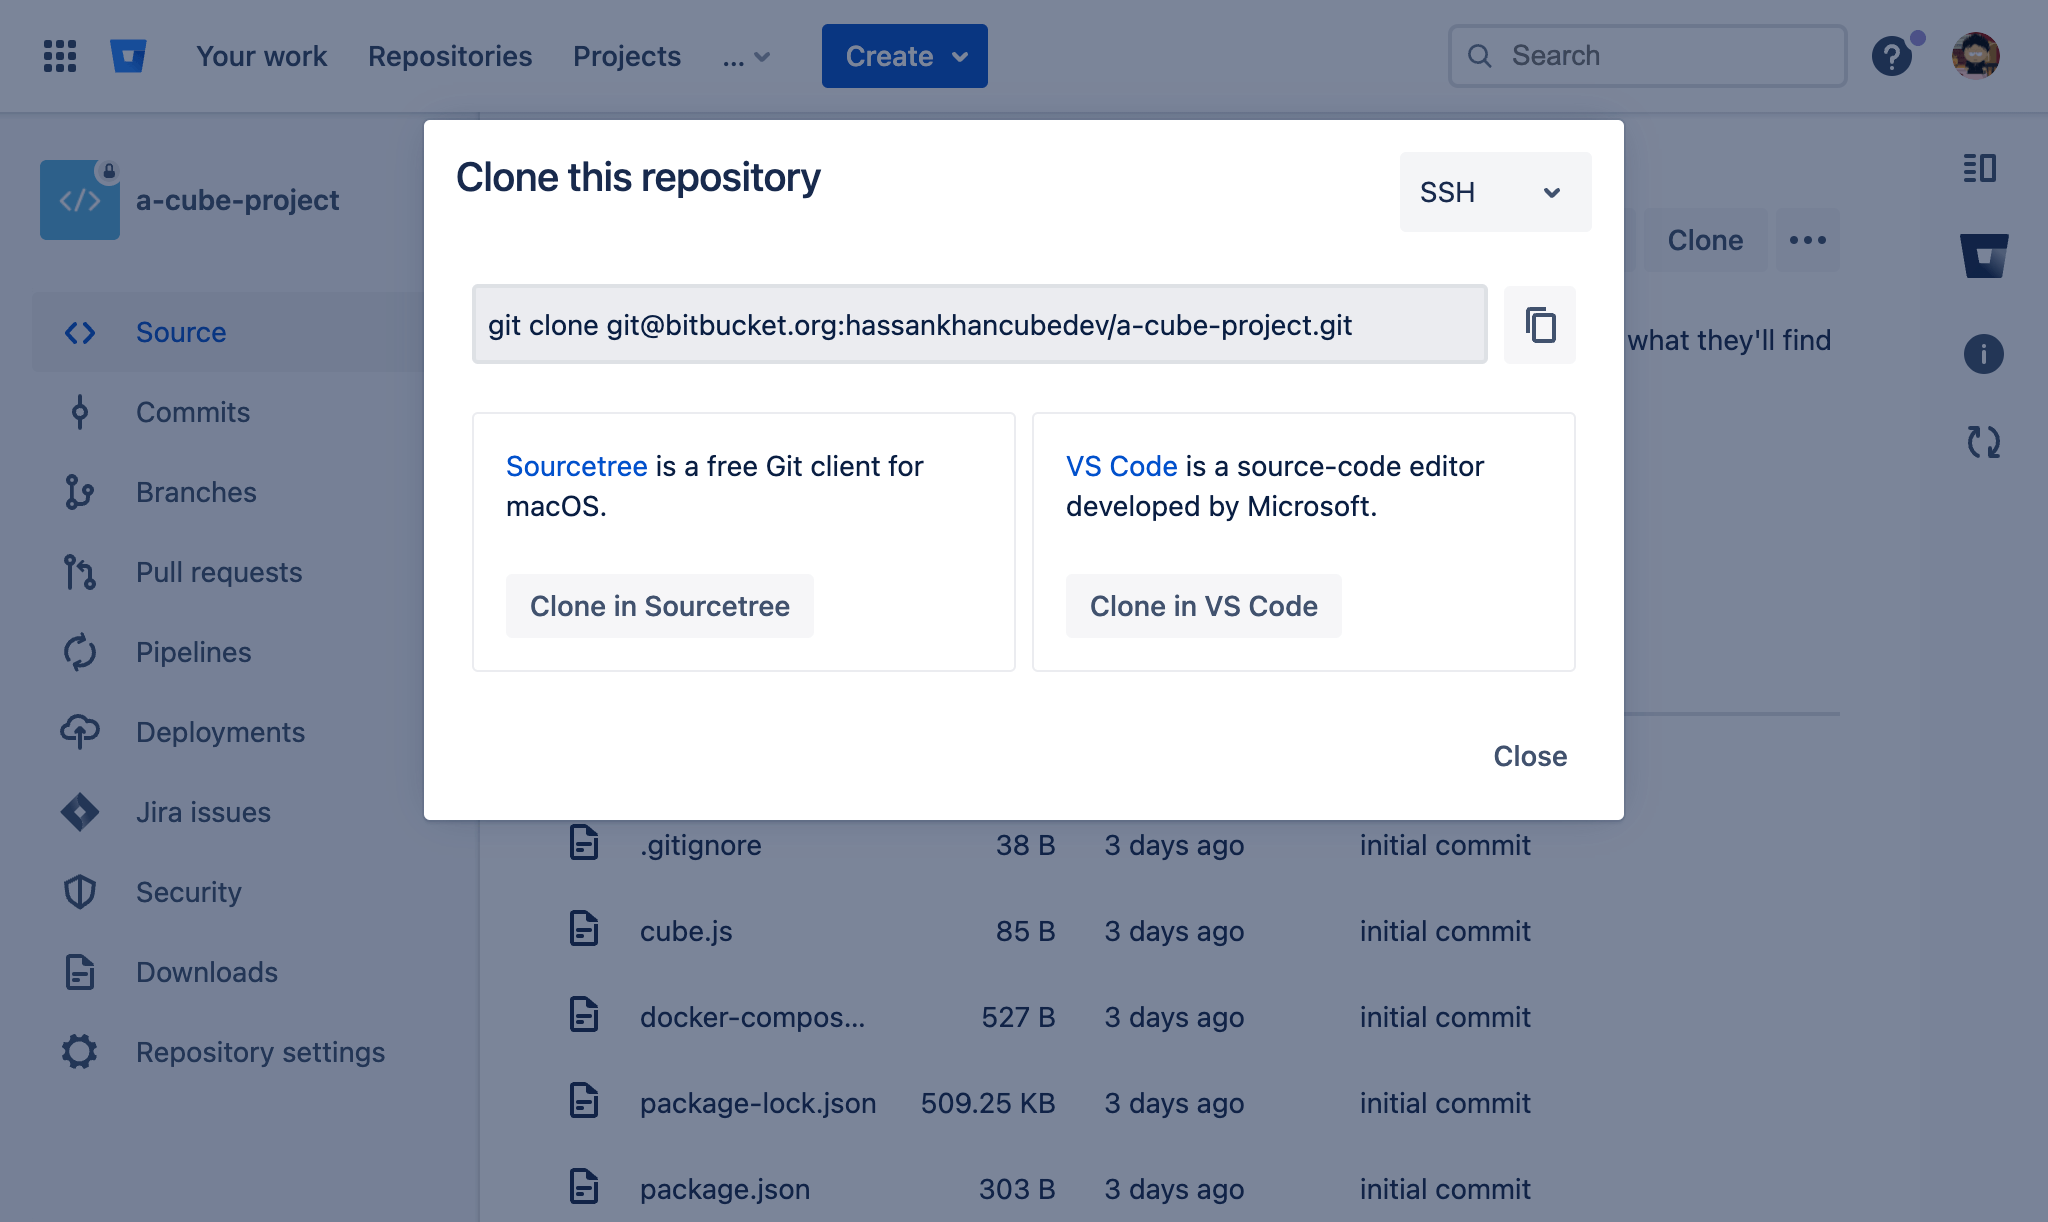
Step 3: Import Git repository
Next up, the second step in creating a Cube App from scratch in Cube Cloud is to click Import Git repository via SSH.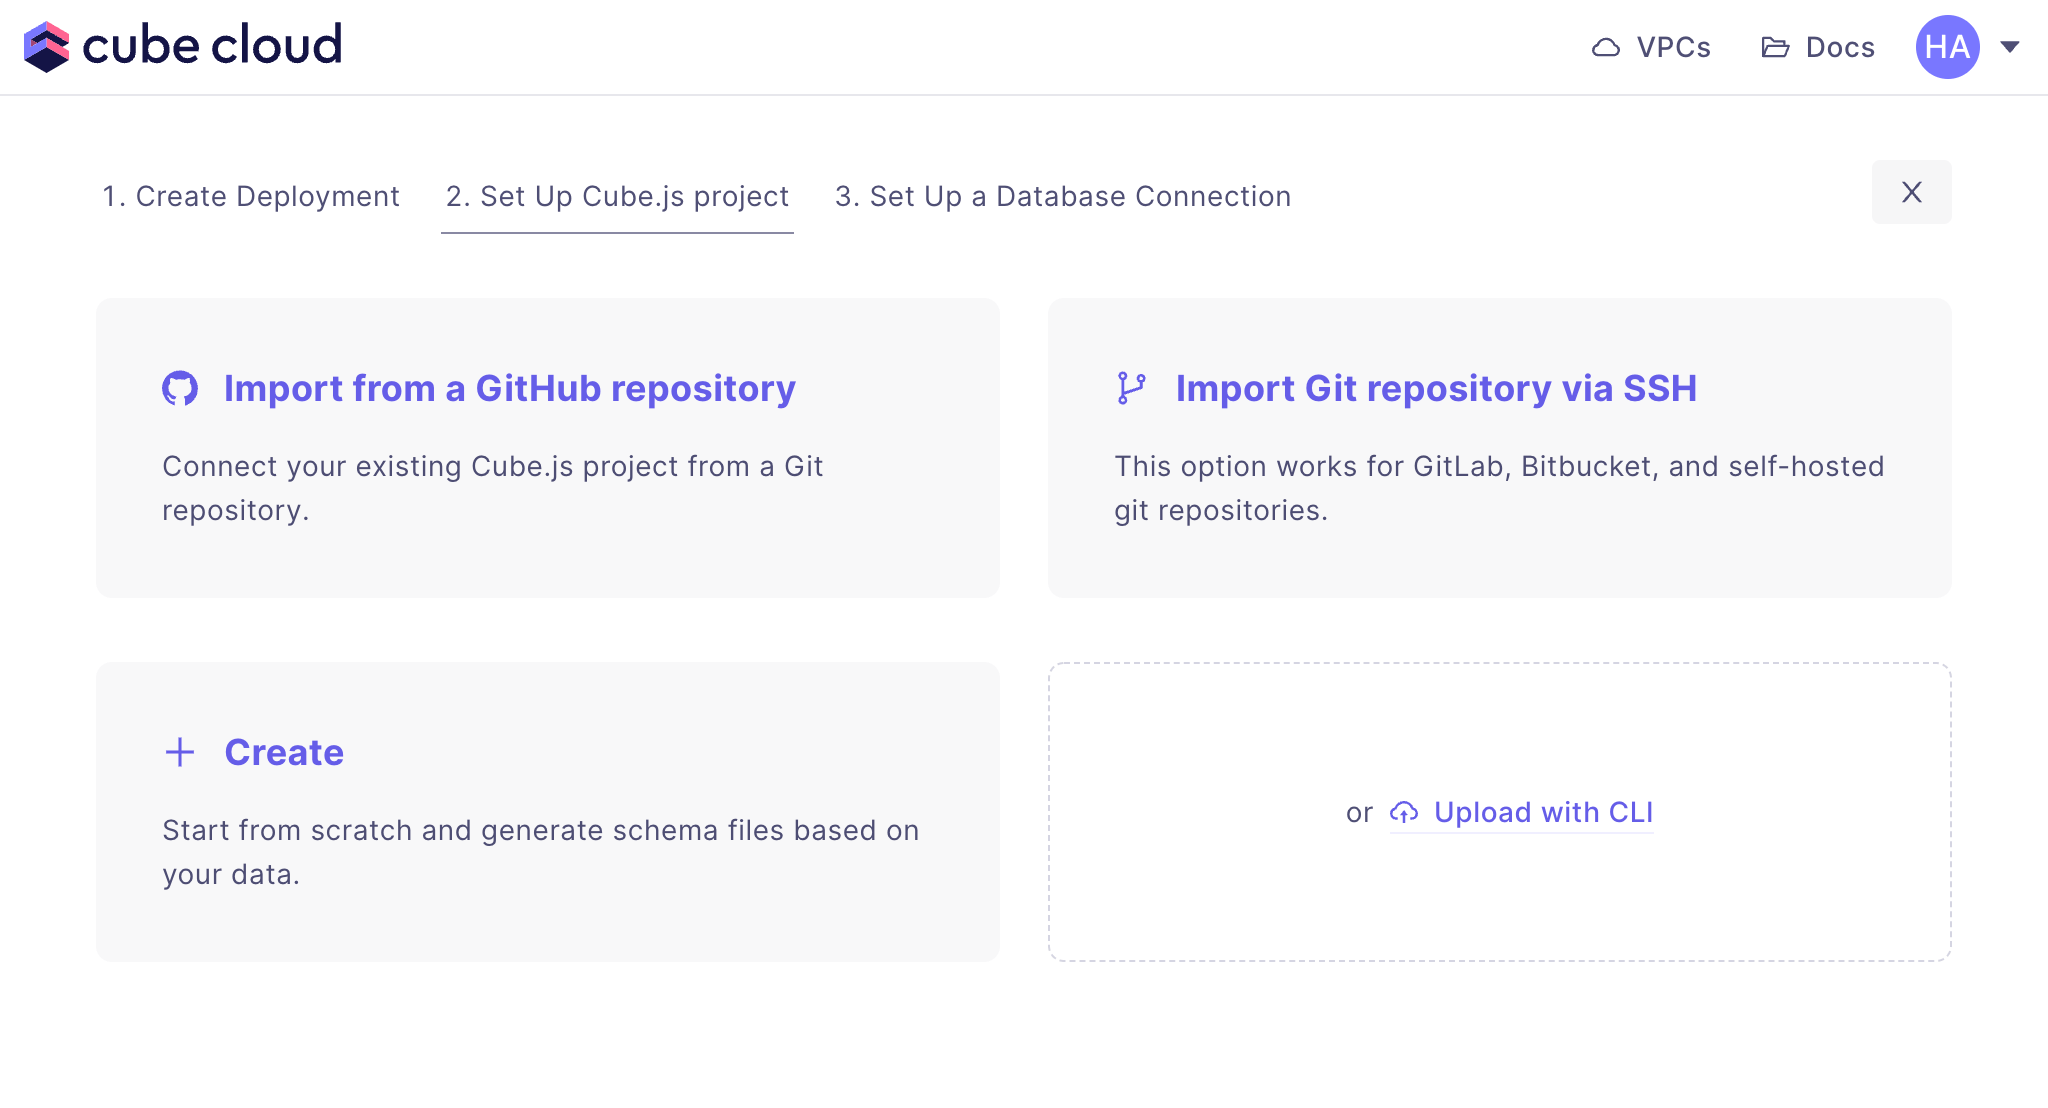
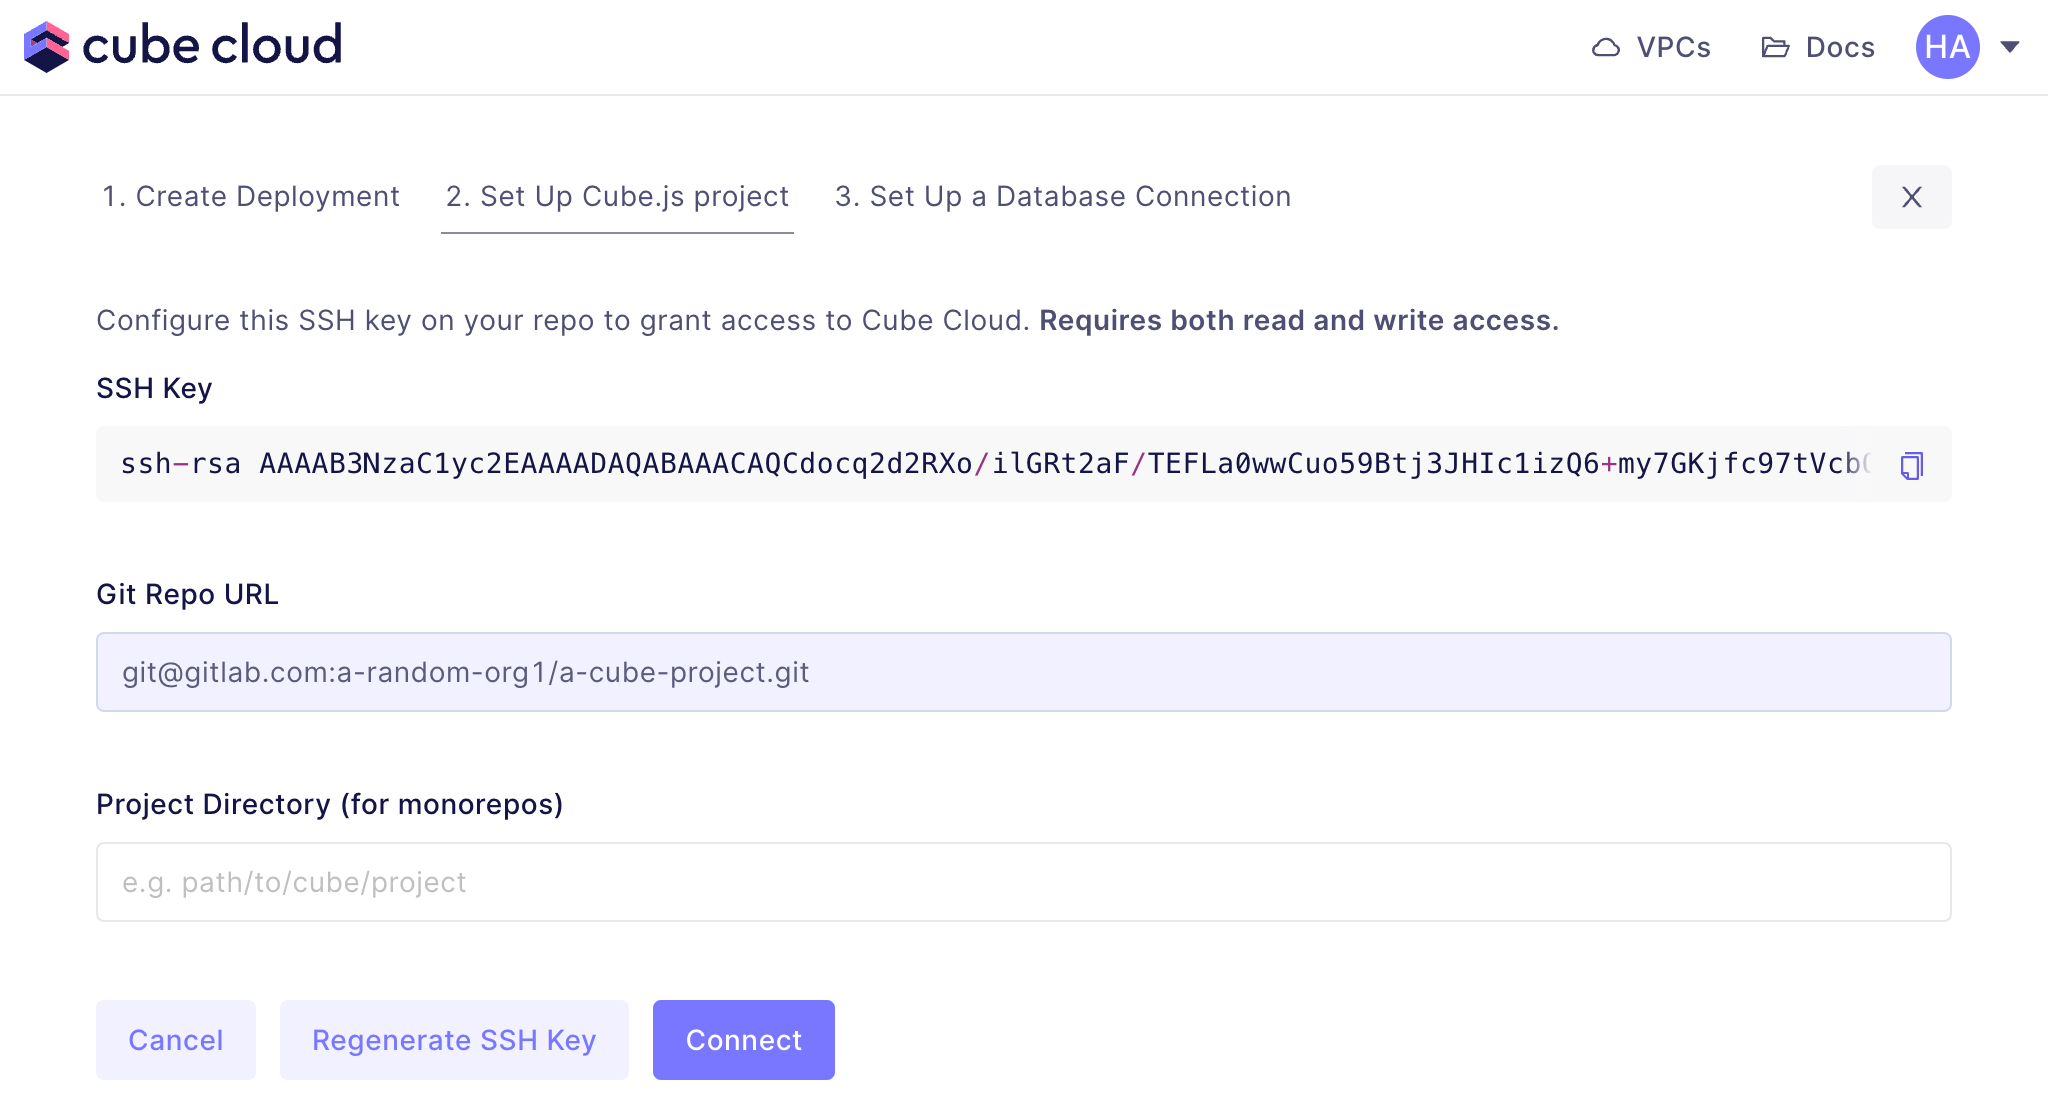
Cube Cloud, for example) and paste the
SSH key in the relevant field:
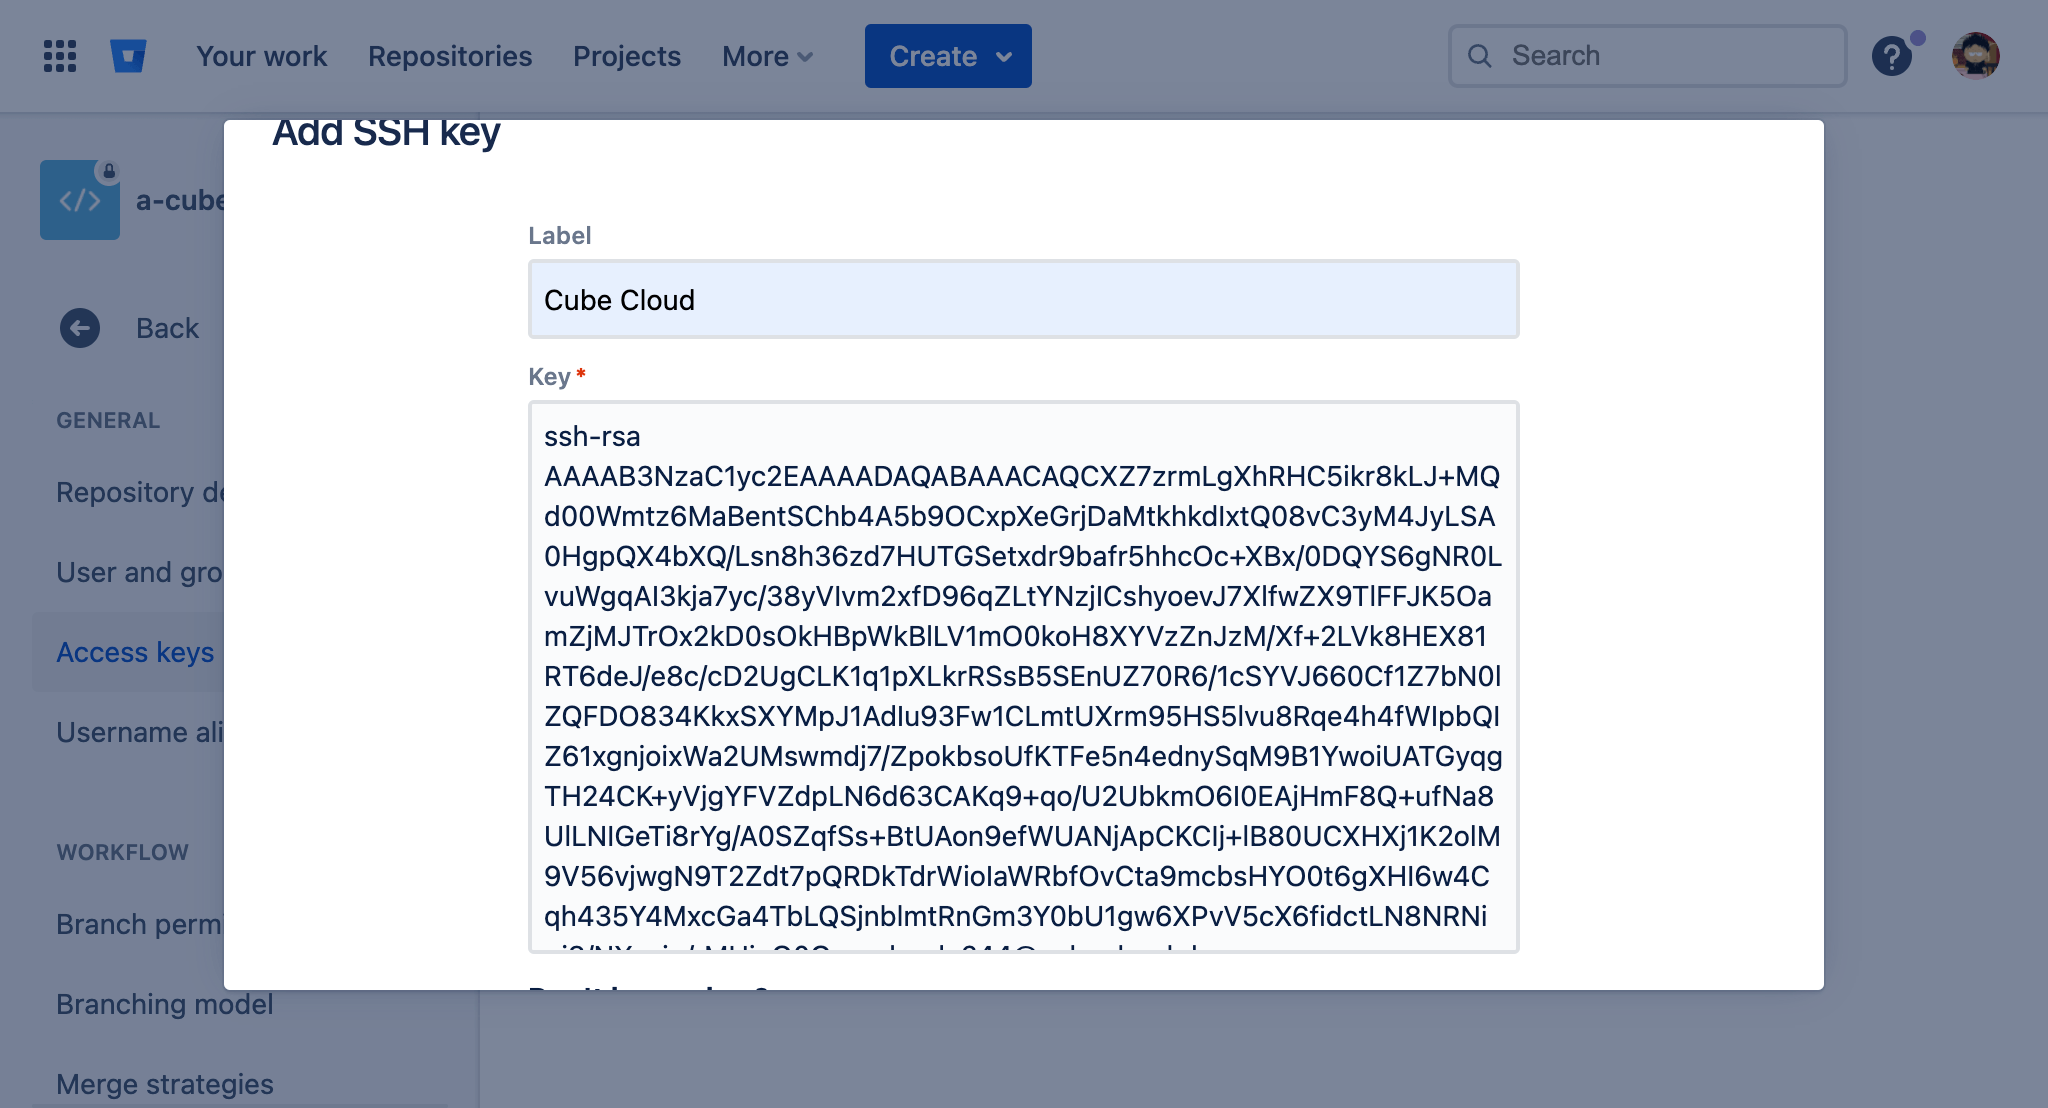
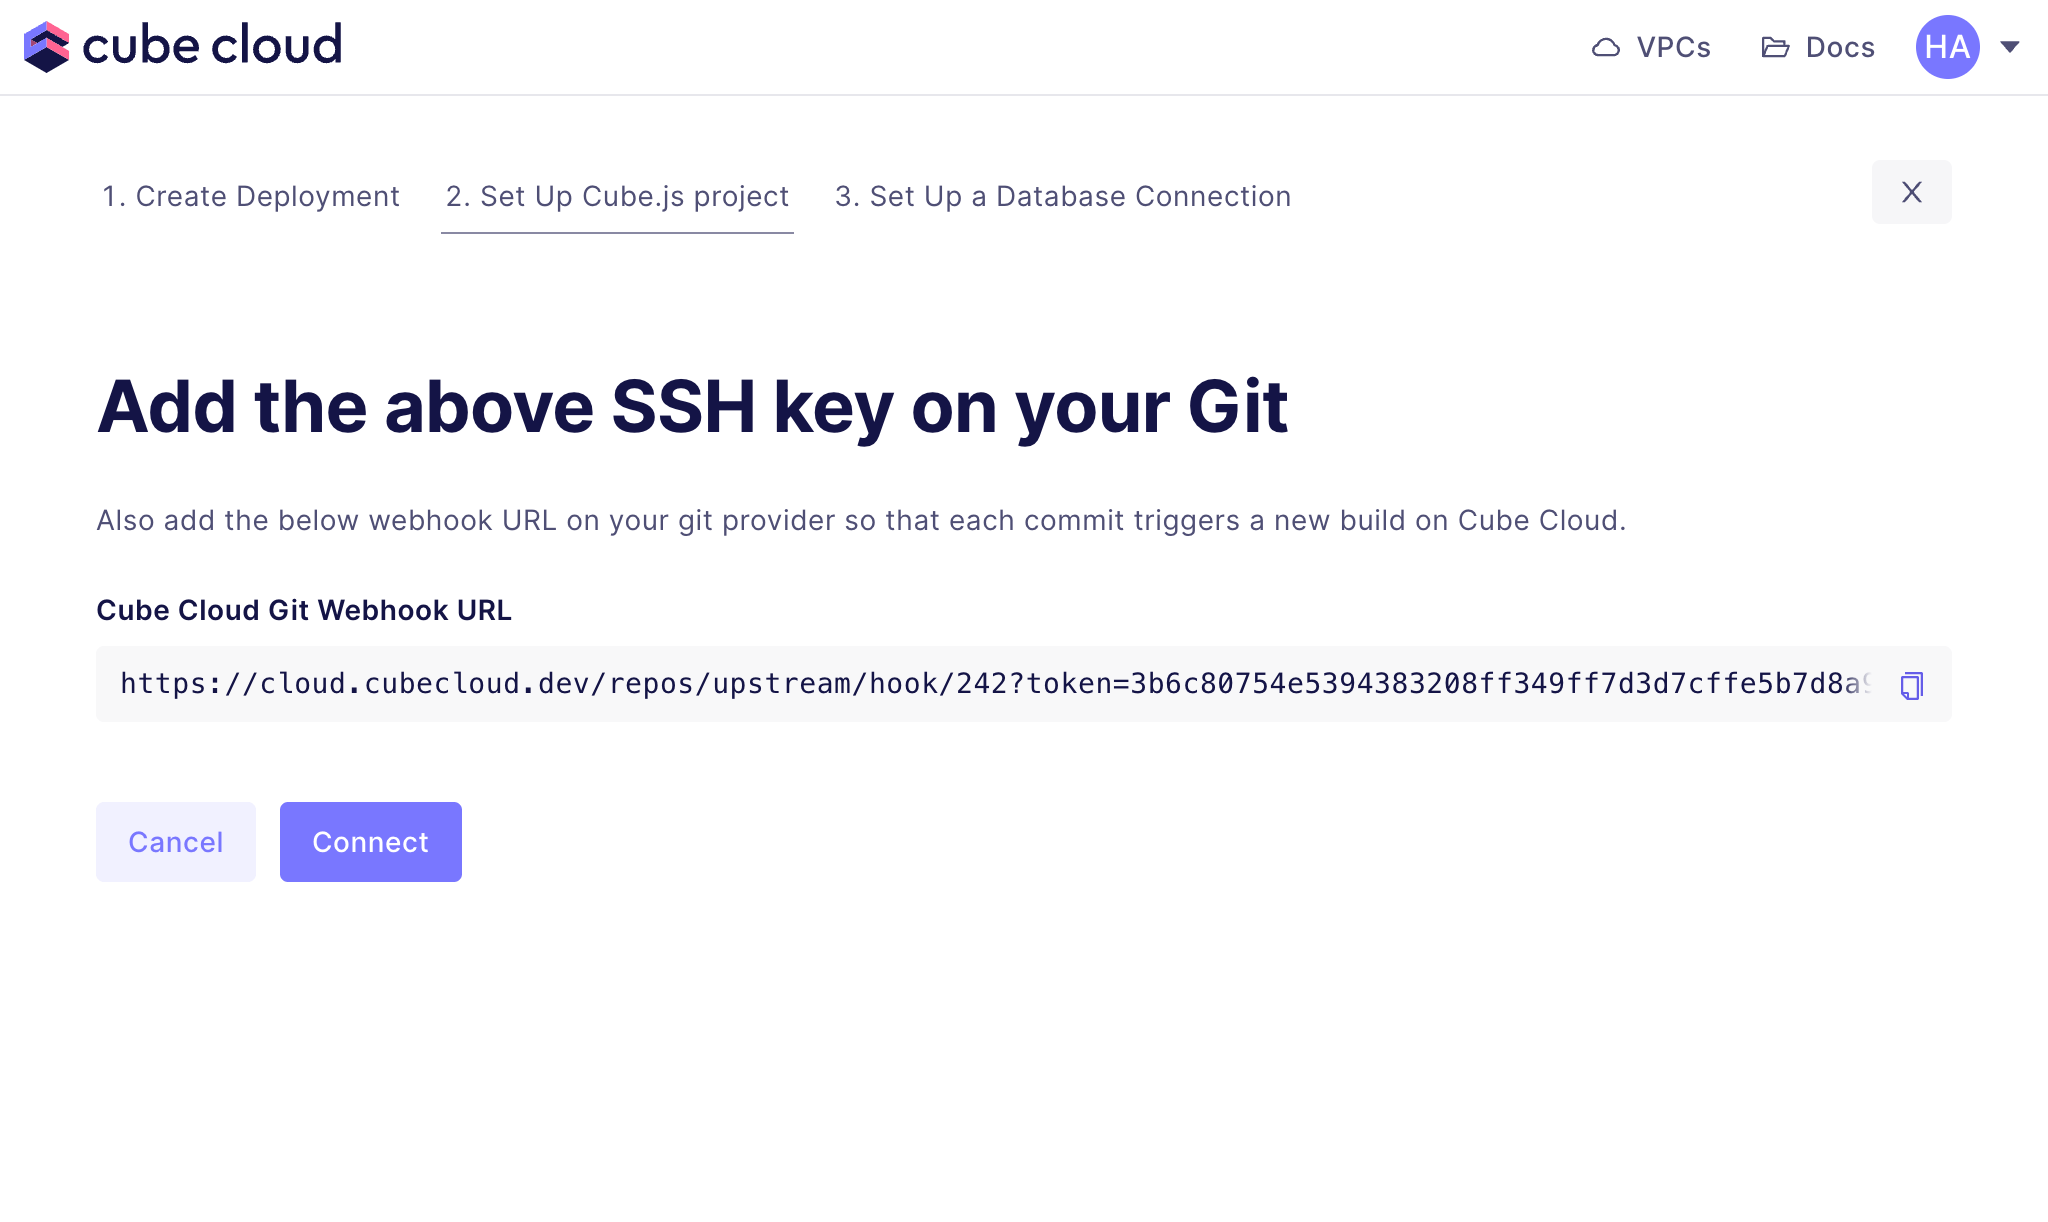
Cube Cloud, for example).
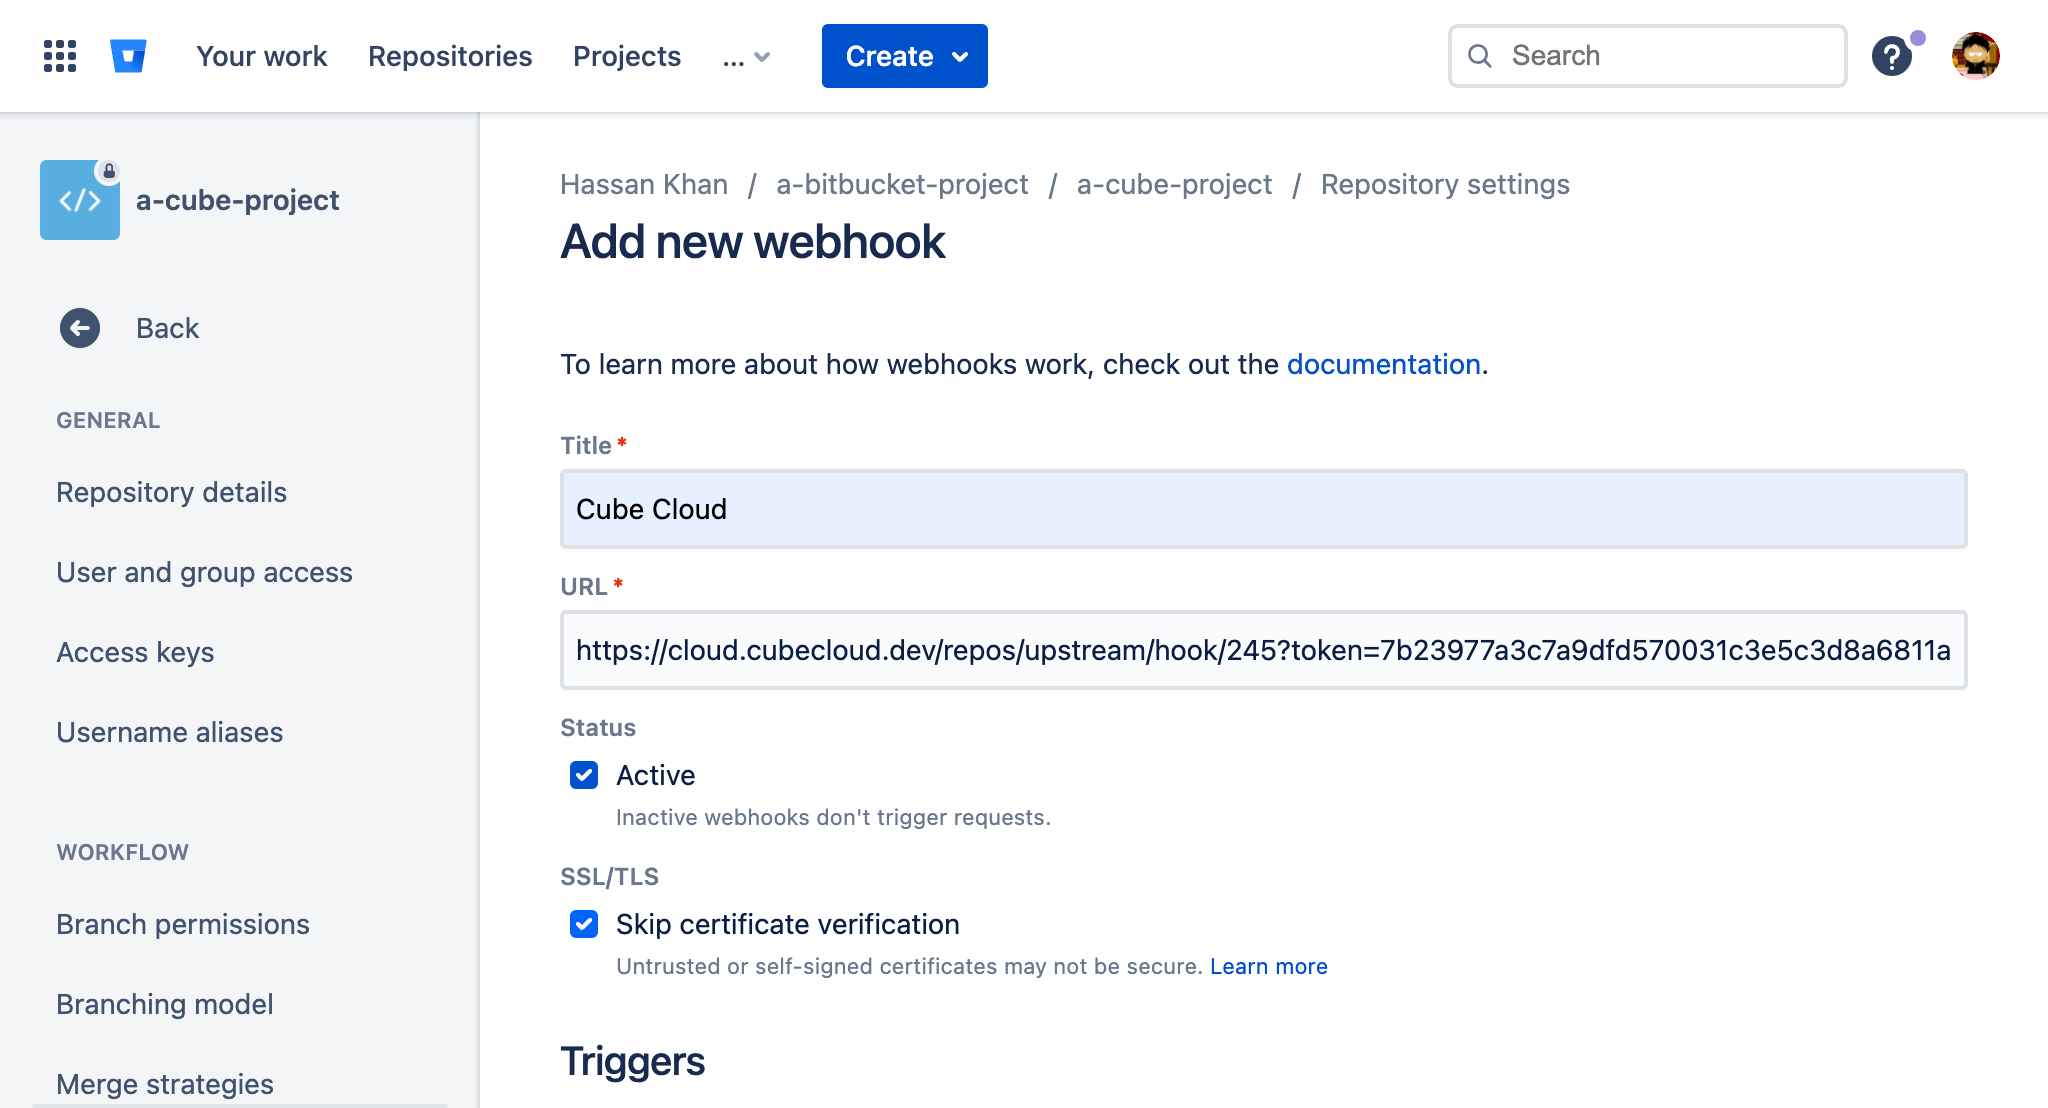
Paste the URL into the correct field, ensure the Repository > Push
trigger is checked and click Save.
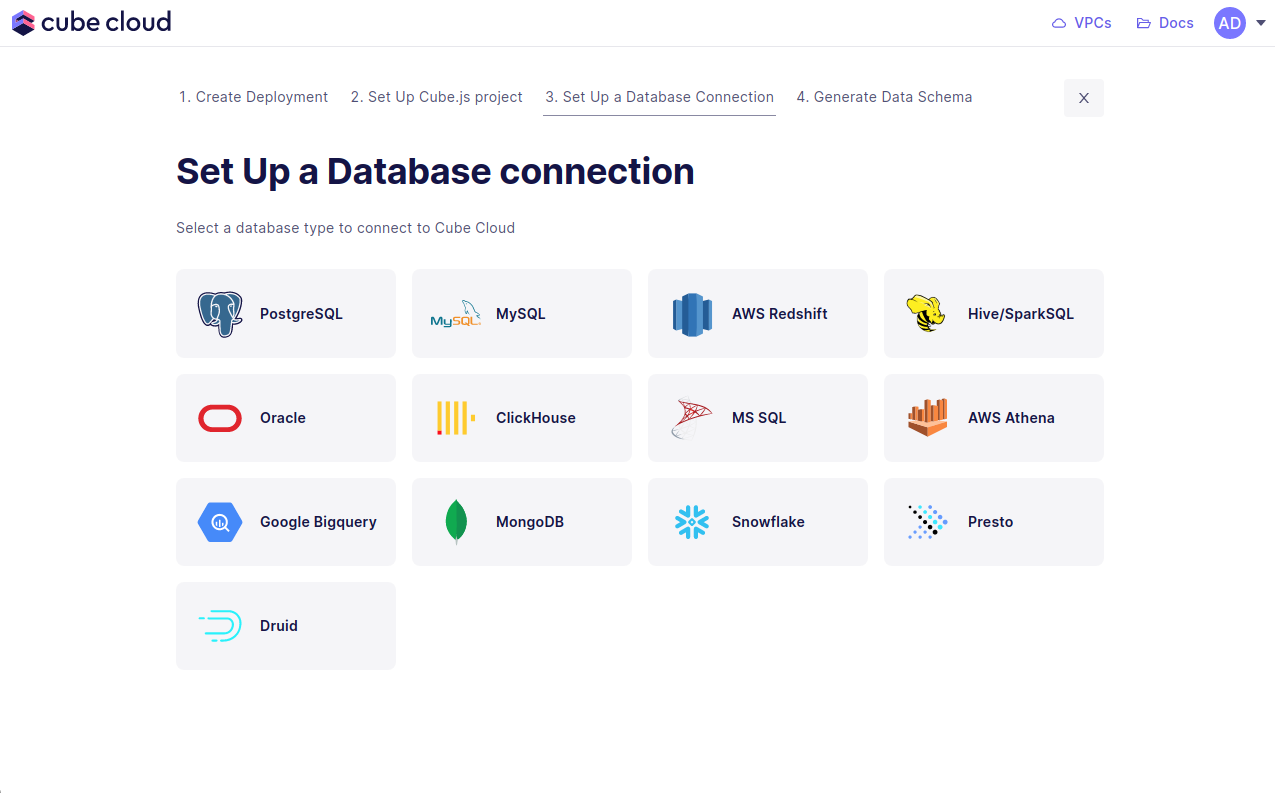
Step 4: Connect your Database
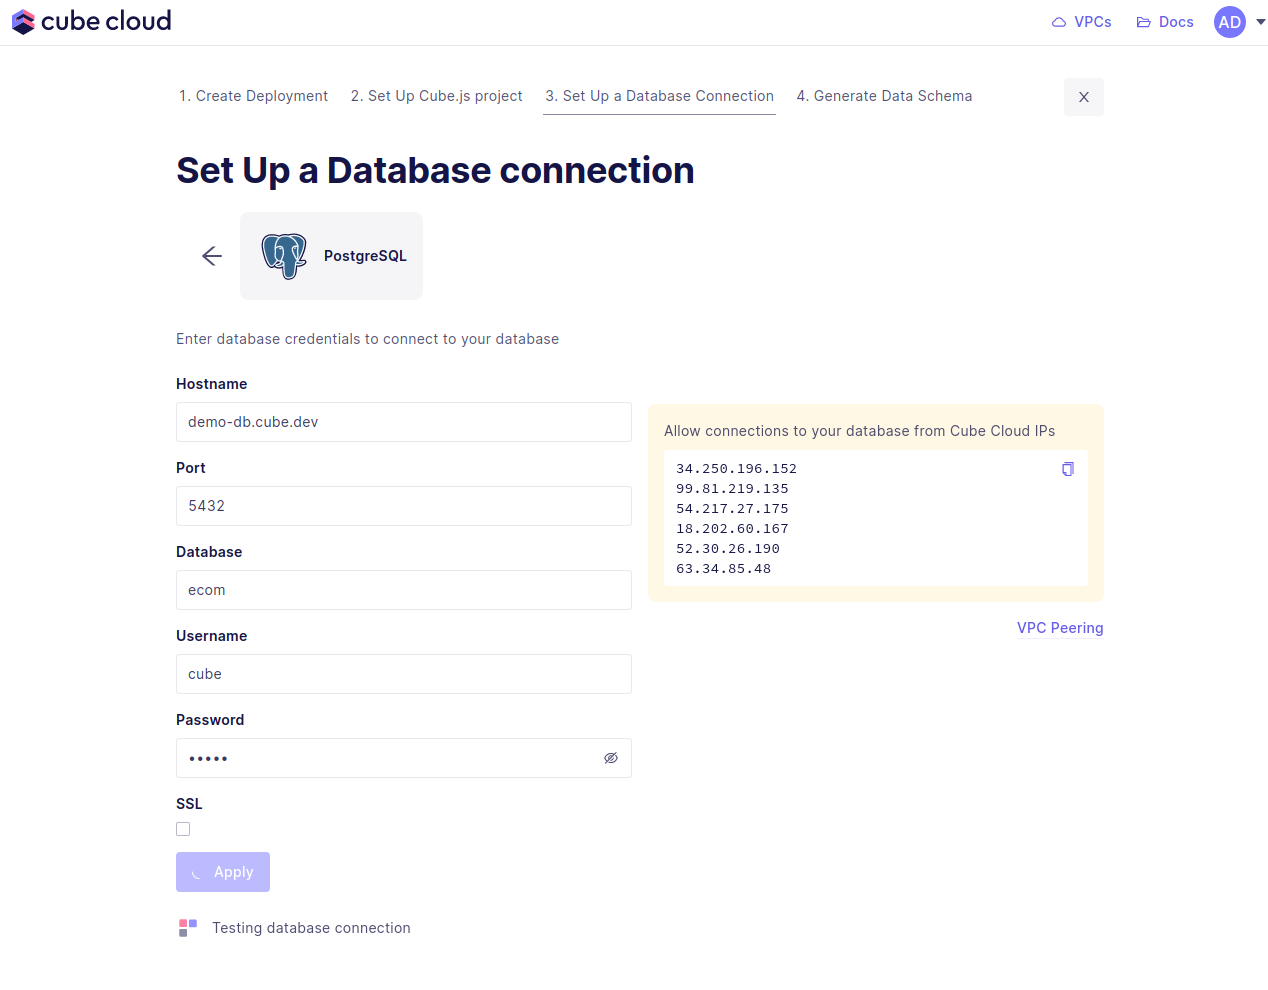
Enter your credentials to connect to your database. Check the connecting to databases guide for more details.Want to use a sample database instead? We also have a sample database where you
can try out Cube Cloud:
| Field | Value |
|---|---|
| Host | demo-db.cube.dev |
| Port | 5432 |
| Database | ecom |
| Username | cube |
| Password | 12345 |
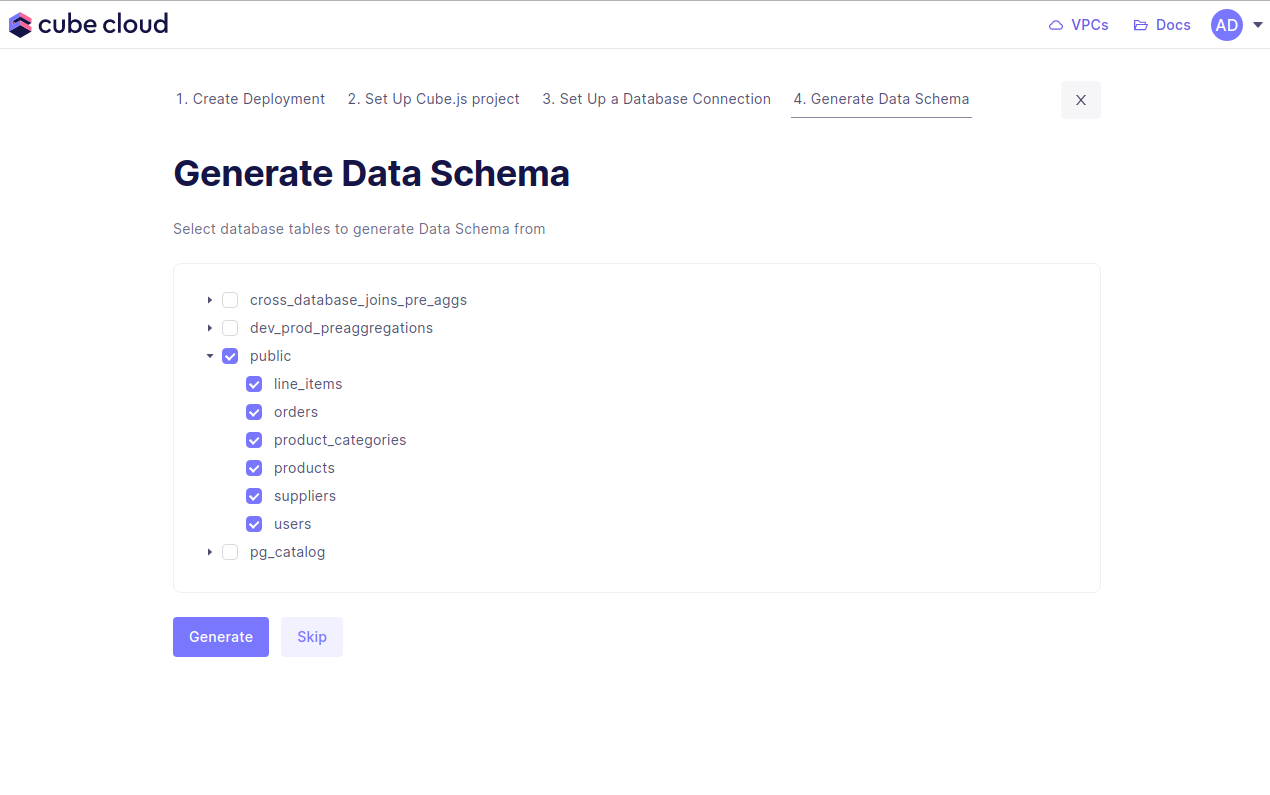
Step 5: Generate the Data Model
Step five in this case consists of generating data models. Start by selecting the database tables to generate the data models from, then hit Generate.